Add Portant app cards to HubSpot
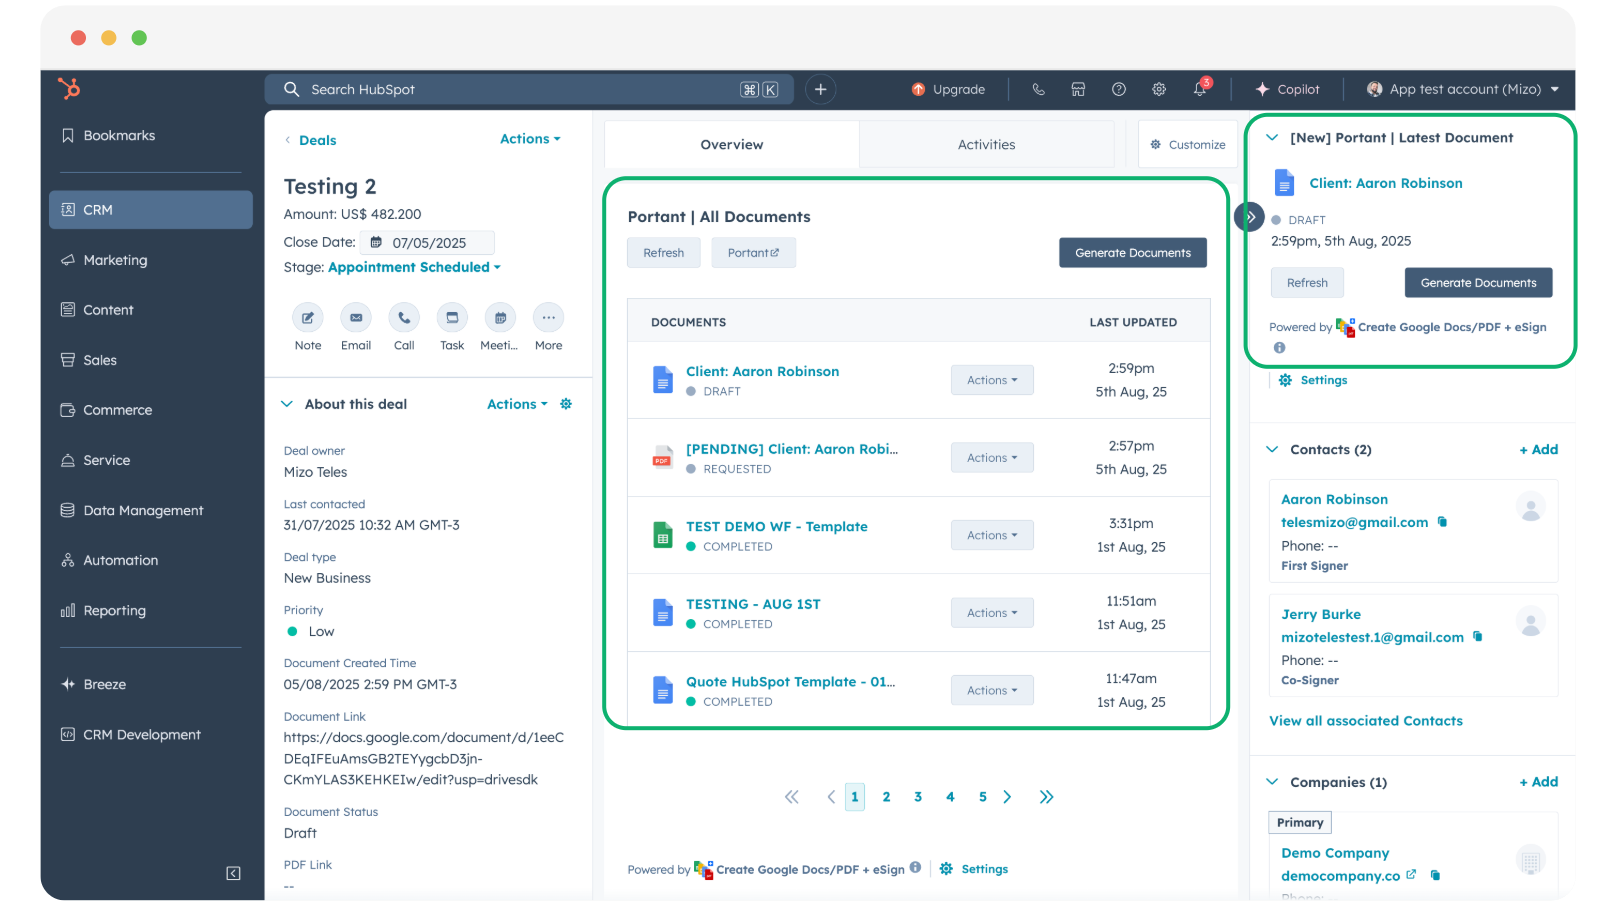
Portant app cards put document actions and recent outputs directly on your HubSpot records, so you can generate, view and approve documents without leaving the deal, contact, company or ticket. This guide shows you how to add and position them.
Before you start, install the Portant app in HubSpot.
Add app cards to a record view
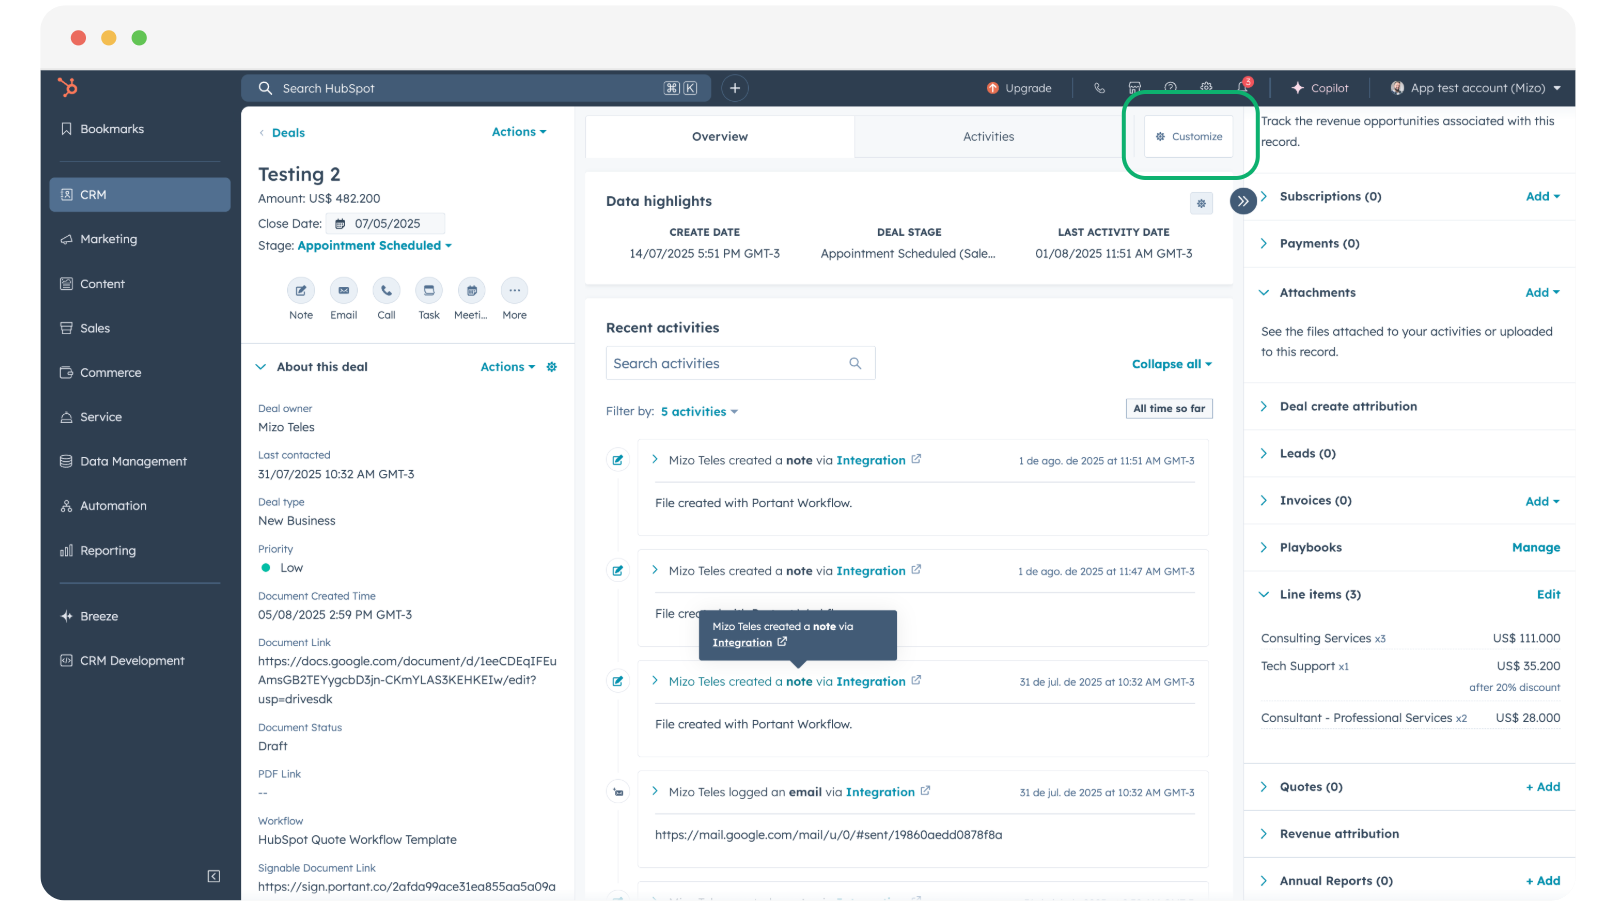
1. Open the record customisation options
Open any record (a contact, company, deal or ticket) and click Customize in the top-right corner.
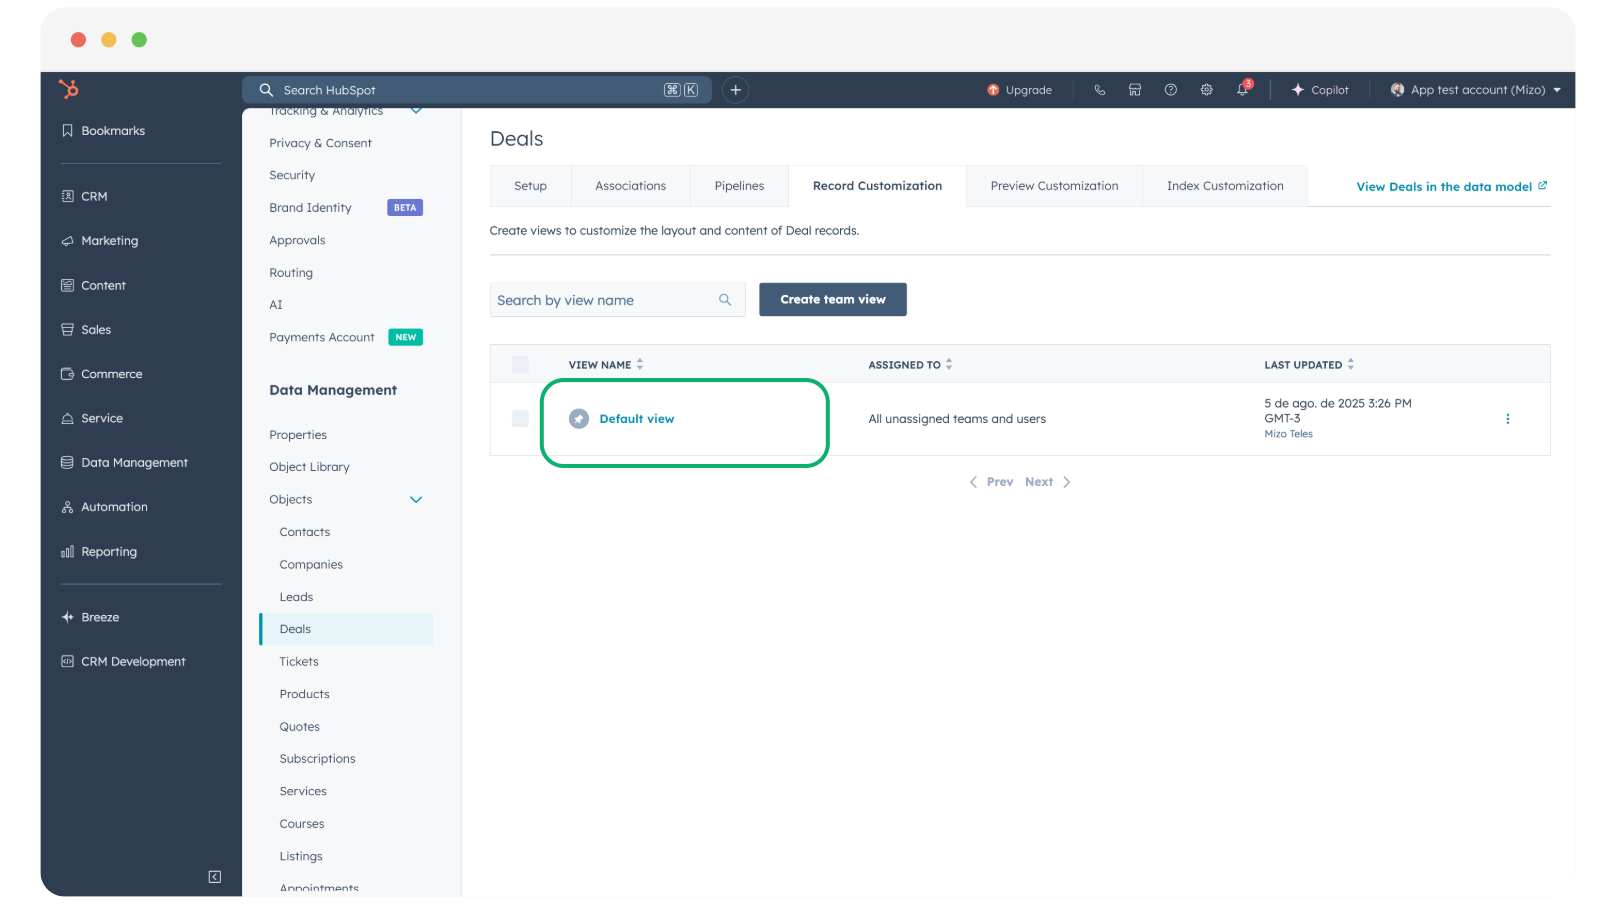
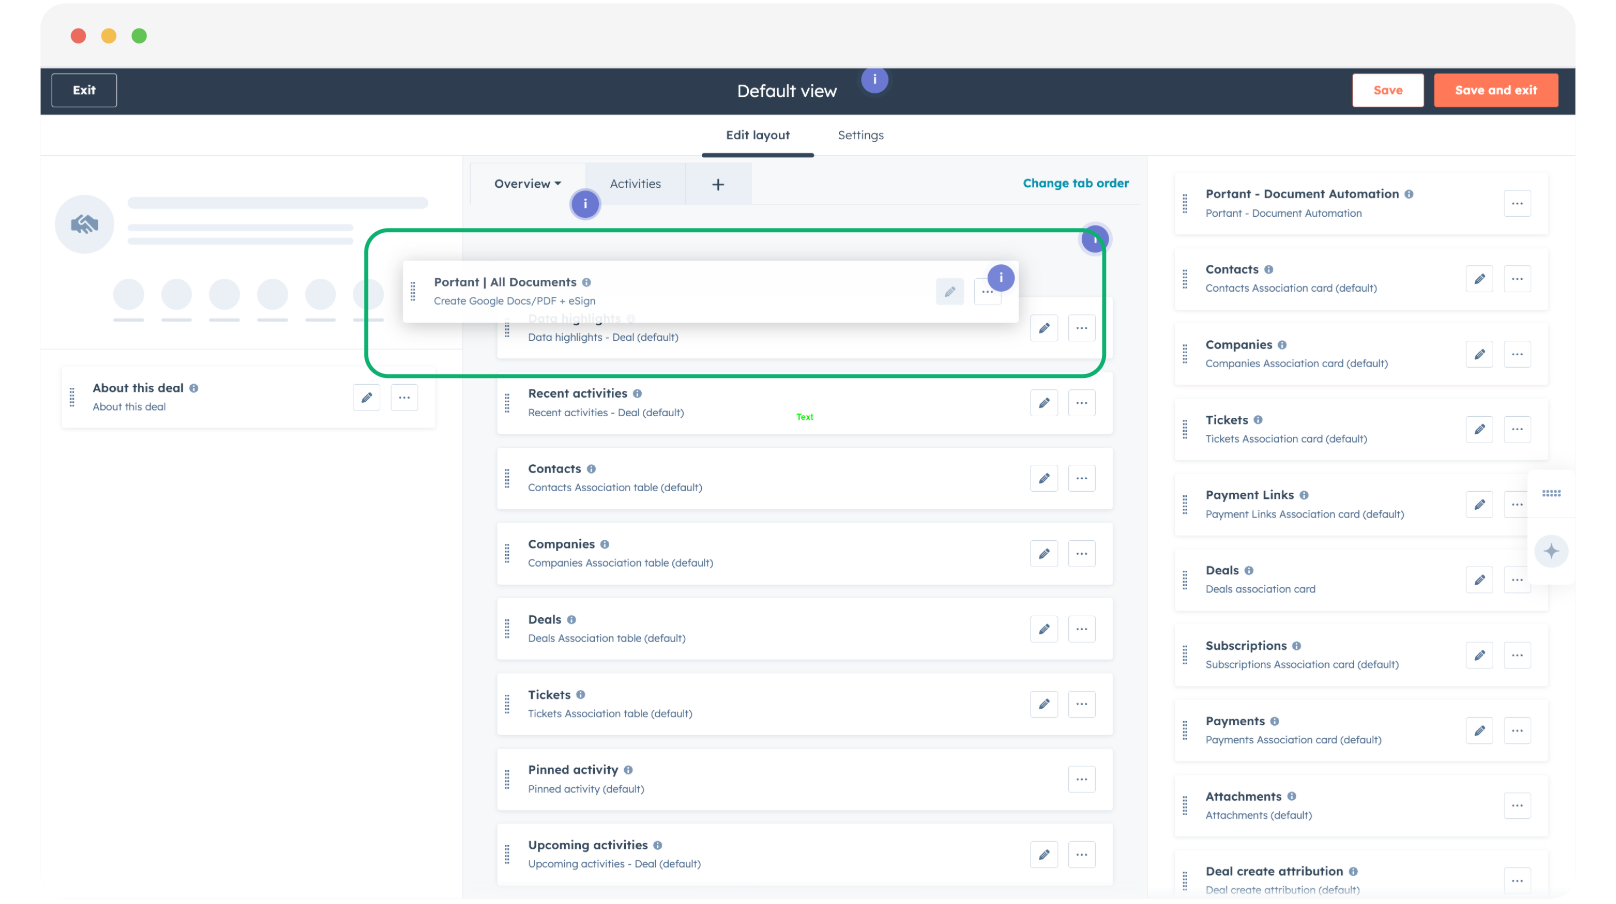
2. Pick the view to customise
Choose the default view, or a specific view, that you want the card on. Click into it to open the customisation settings.
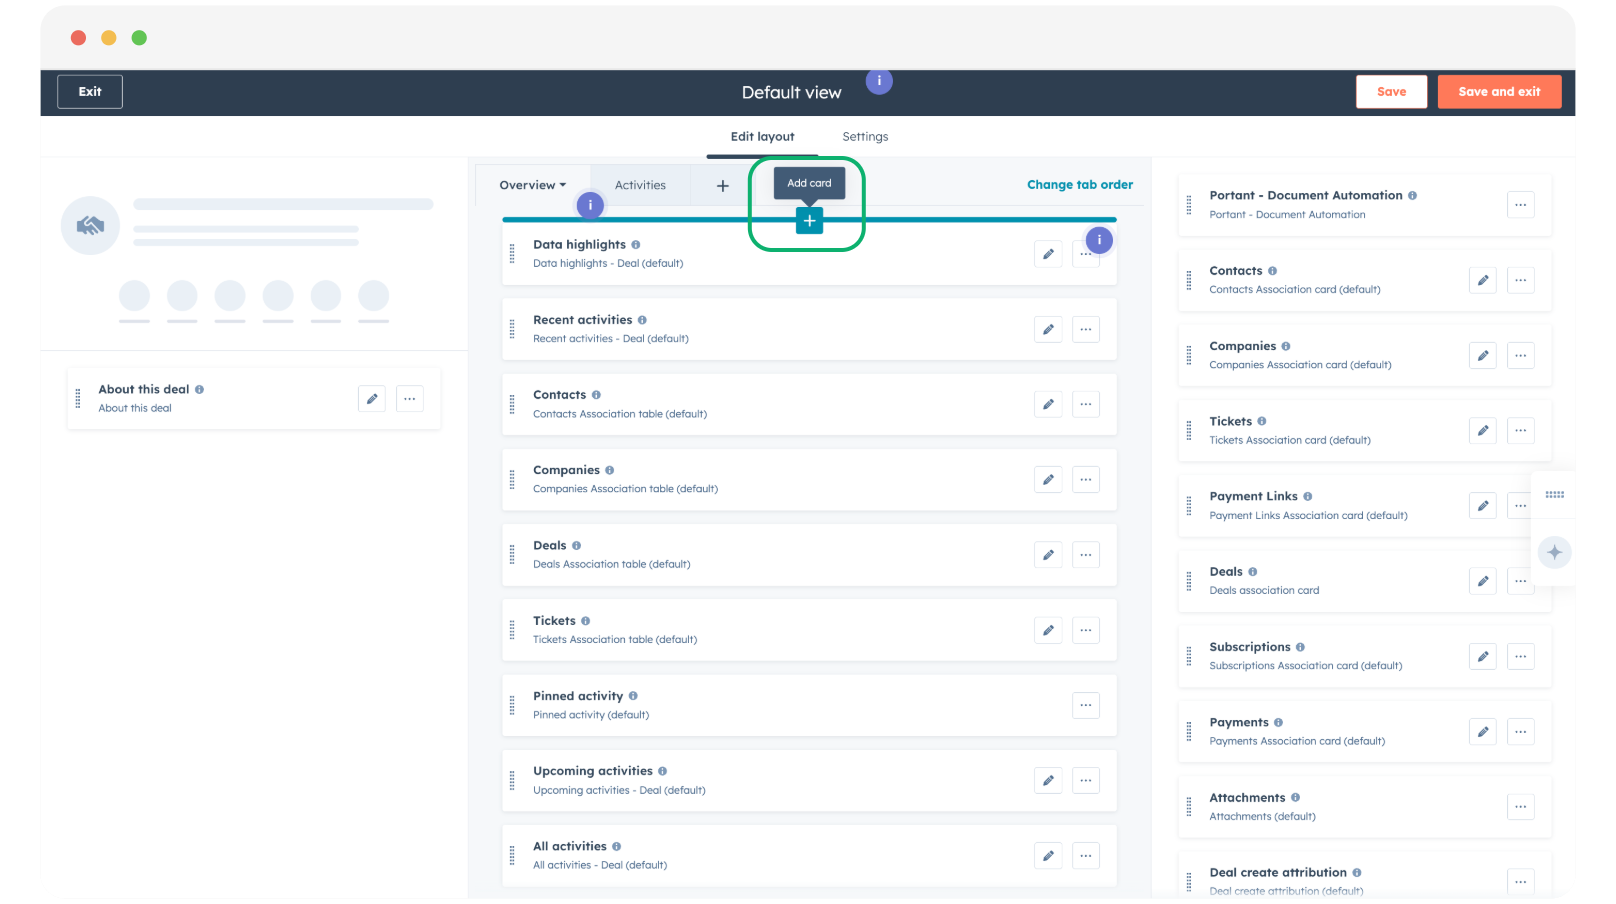
3. Add a Portant card
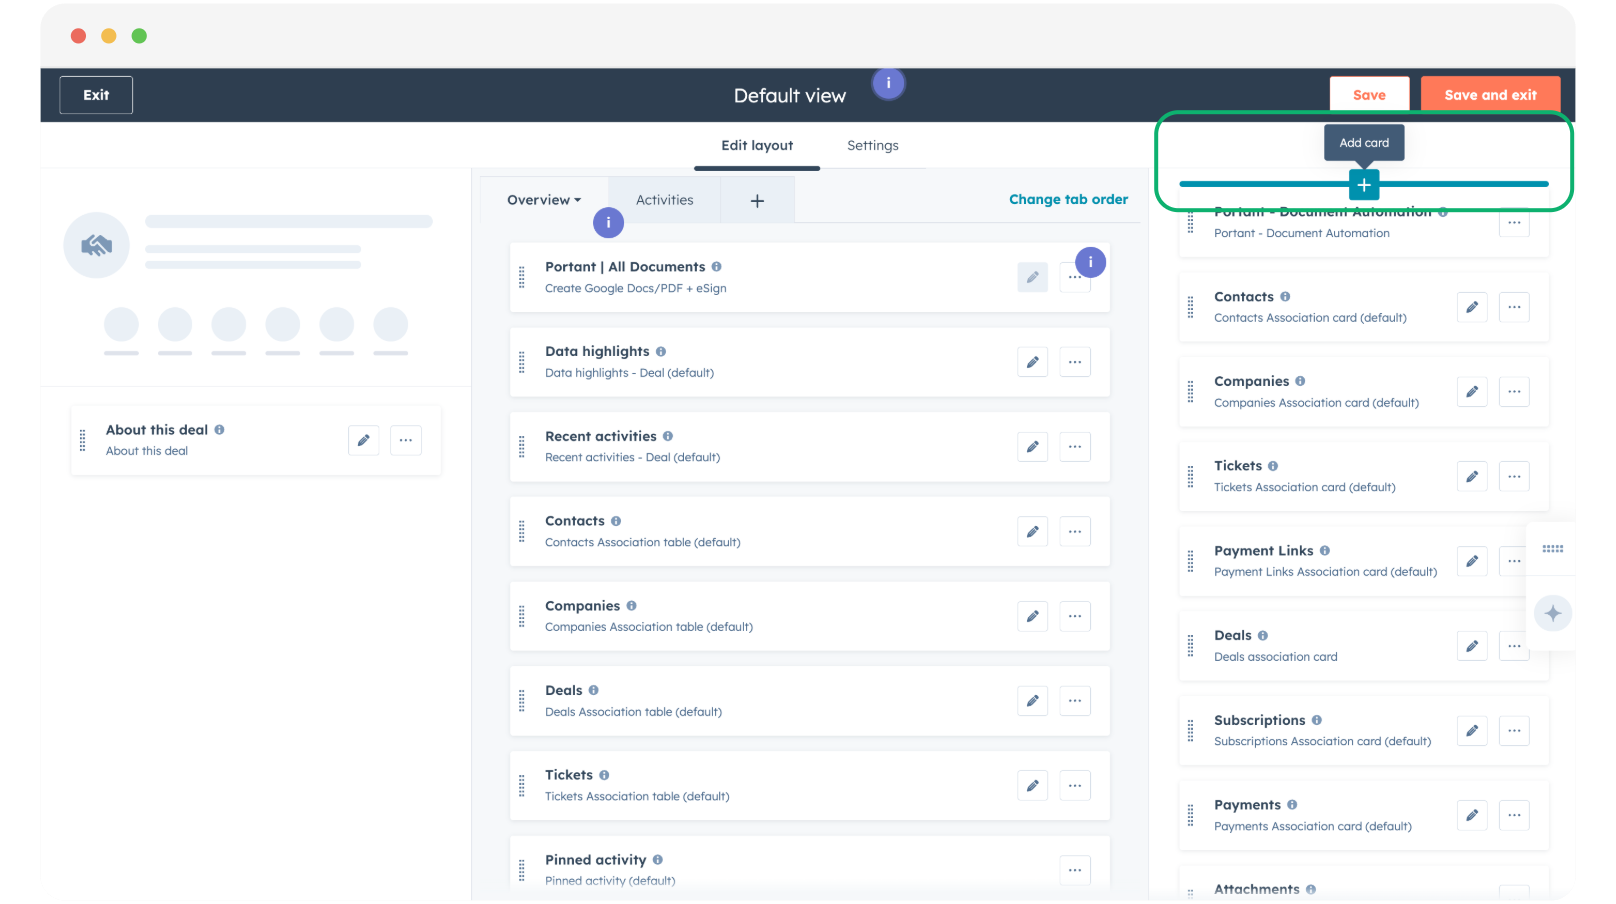
In the middle section, hover over the first item until the green Add Cards plus icon appears, then click it.
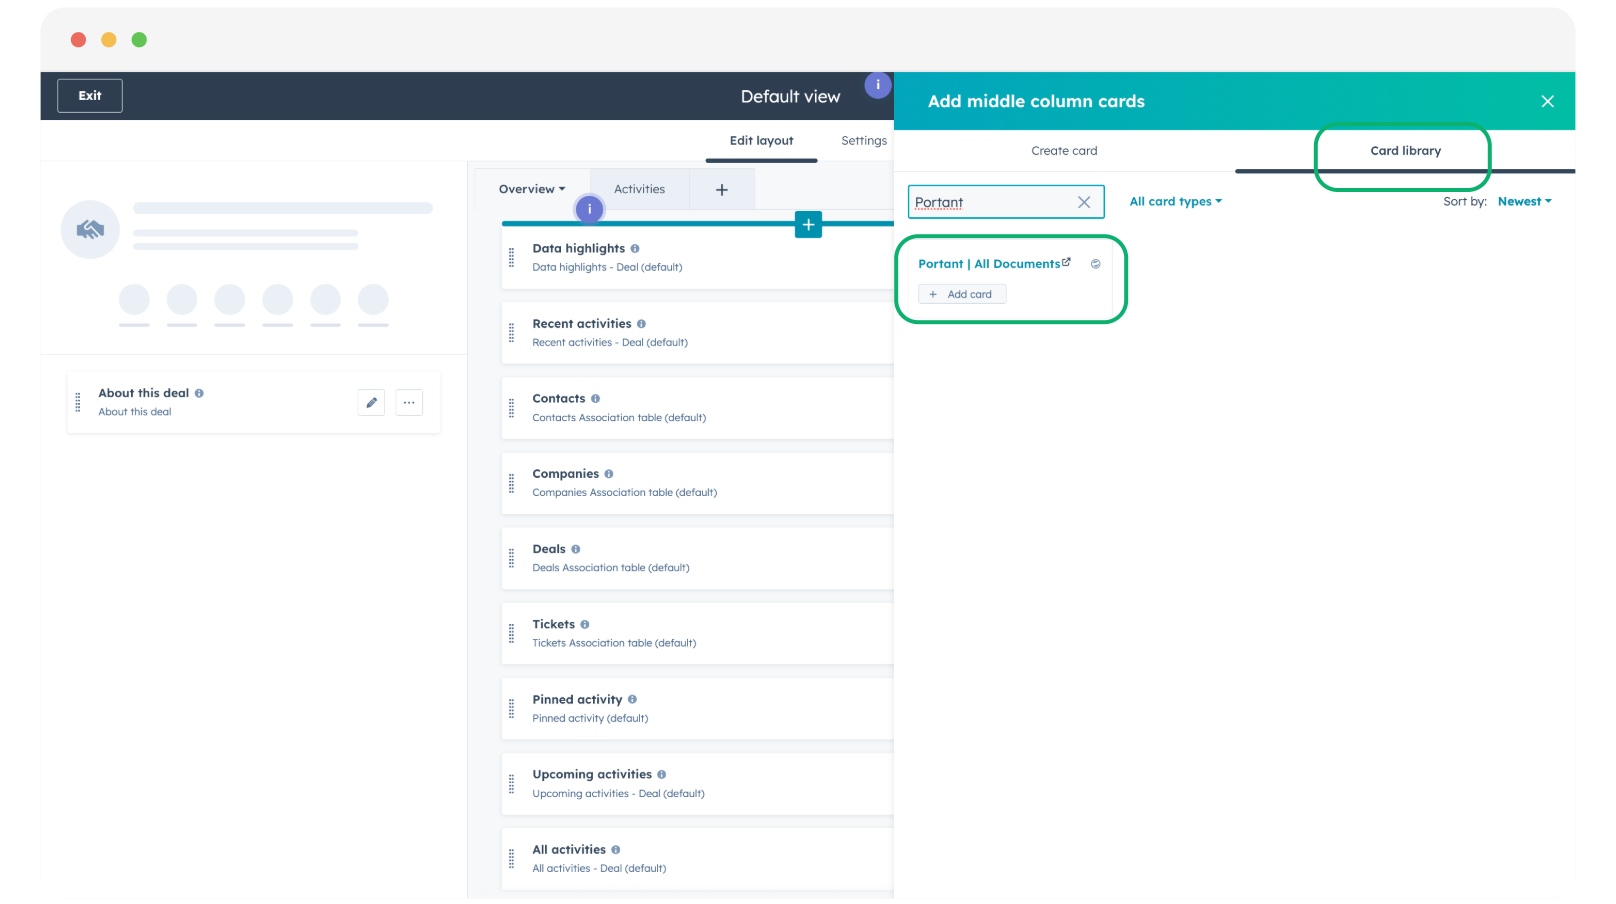
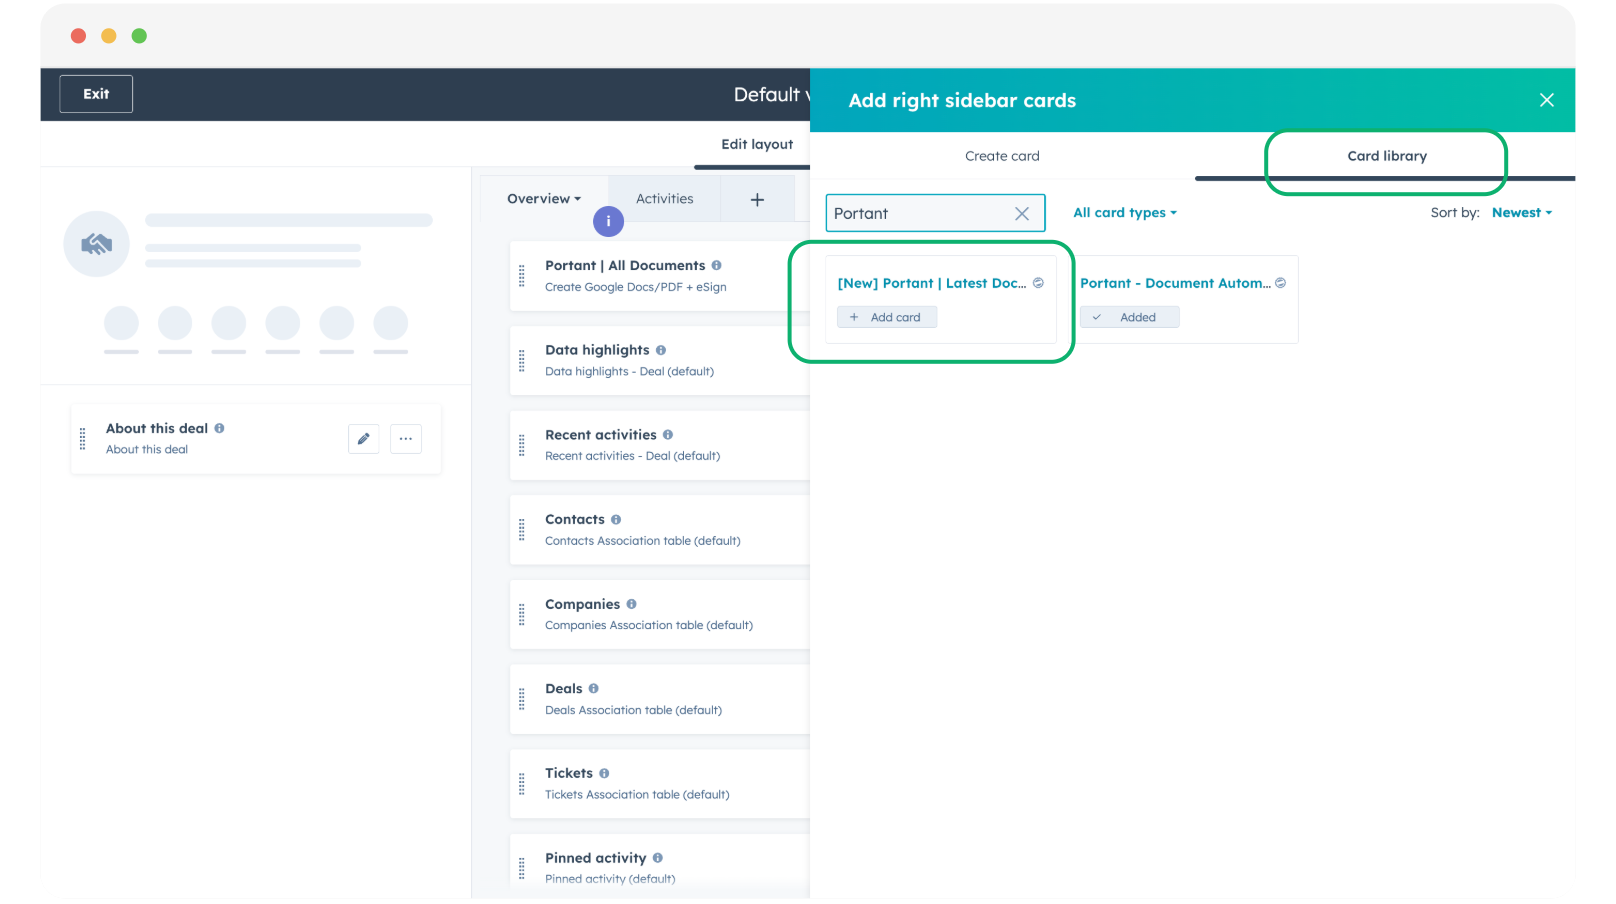
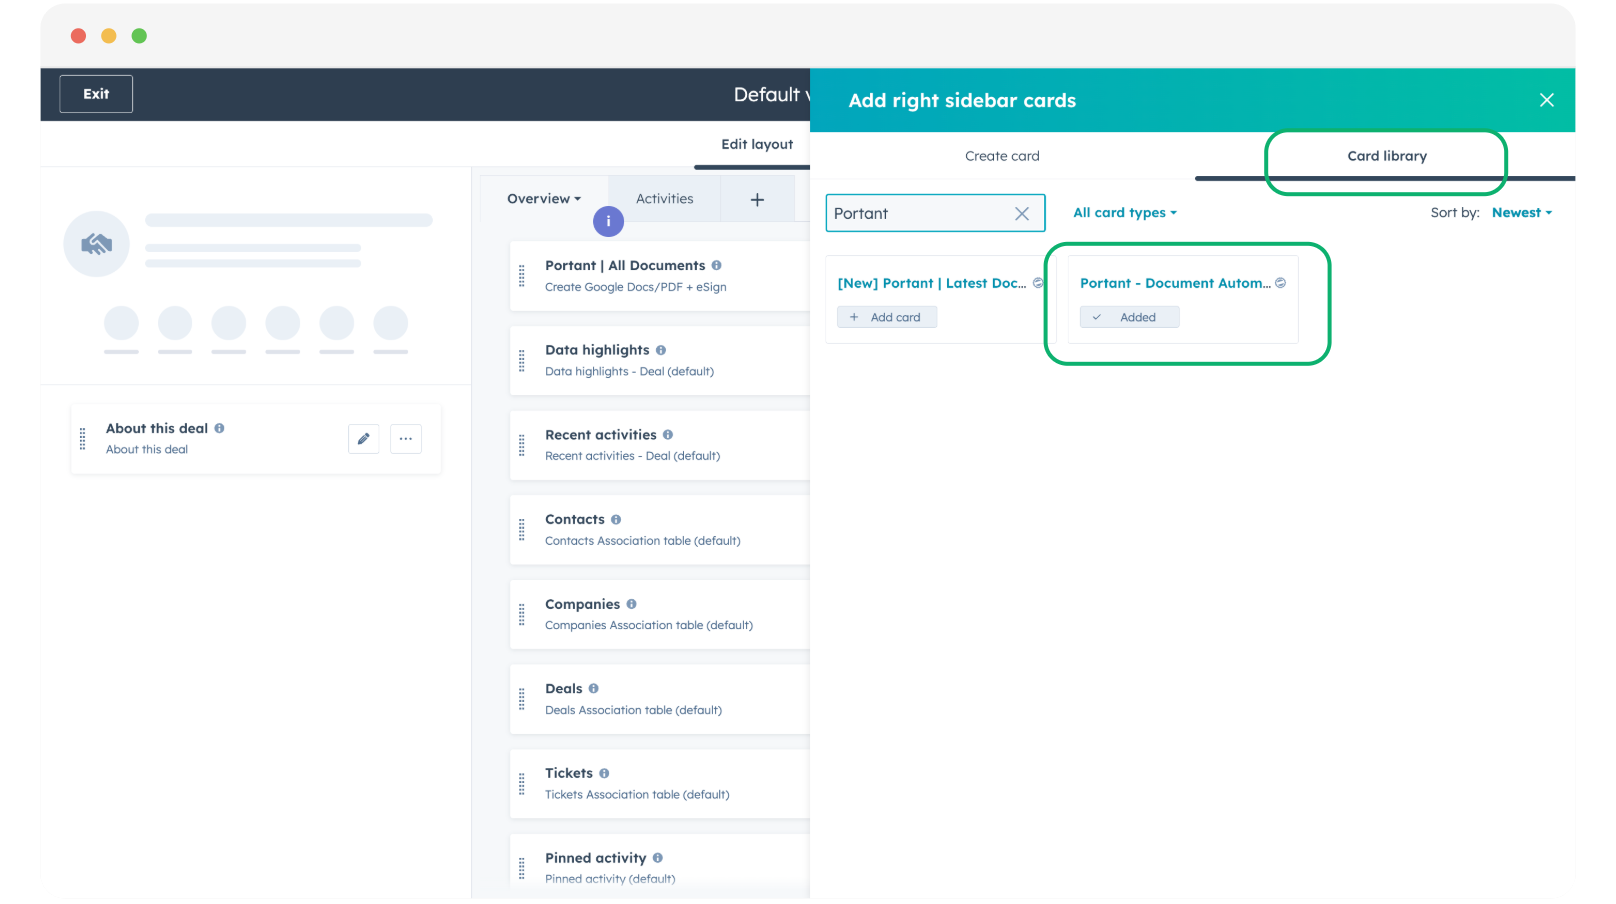
Switch to the Card library tab, search for "Portant", then click + Add card on the card you want.
4. Position the card
Scroll to the bottom of the list to find the new card, then drag it to where you want it on the record view.
5. Add the card to the right-hand sidebar (optional)
Repeat the same steps for the right-hand sidebar if you want a card there too.
The "Portant Latest Documents" card is a good fit for the sidebar. Find it in the Card library tab and click + Add card.
6. Remove the old CRM card (optional)
If you no longer need it, you can remove the old "Portant - Document Automation" CRM card.
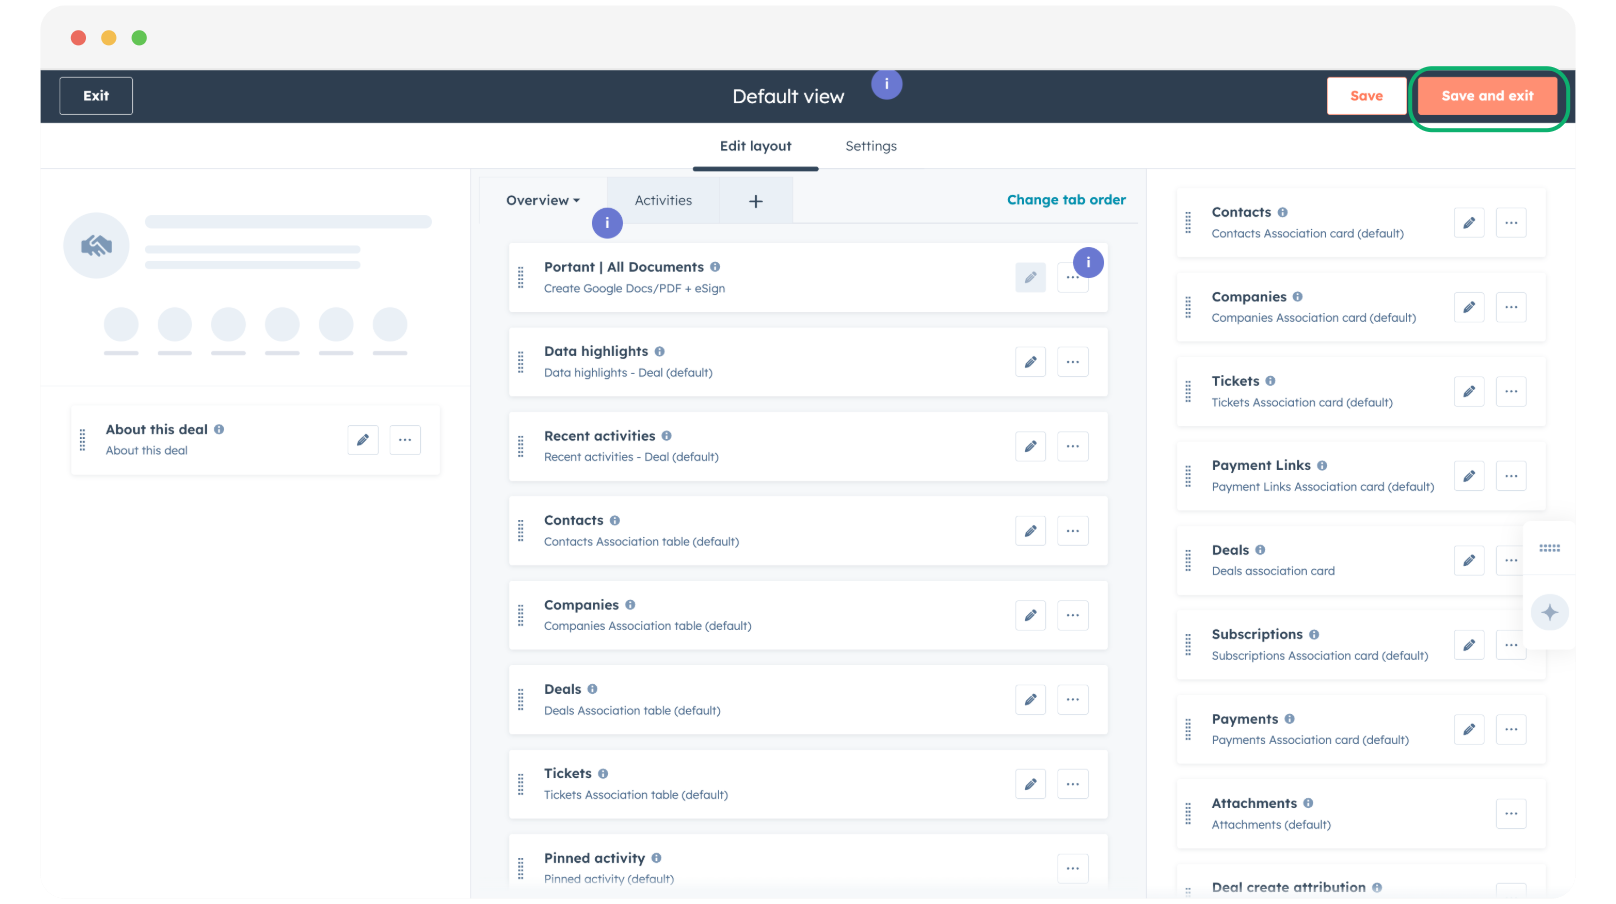
7. Save and exit
Click Save and Exit to apply the changes.
8. Check the record view
Open a record to confirm the new card is showing in the right place and the old one is gone. Tweak the position if needed.
For more on customising HubSpot record views, see HubSpot's own Customize records guide.