Capture data back to HubSpot with HubSpot capture fields
Add fillable fields to a signable document and map them to HubSpot properties. When the signer fills them in, the data flows straight back to your CRM record. No retyping, no copy-paste.
In this guide:
- Add HubSpot capture fields to a signature block
- Pick the HubSpot object to update
- Choose the properties to capture
- Insert the field tags into your template
- Control the field appearance
- See the data update HubSpot
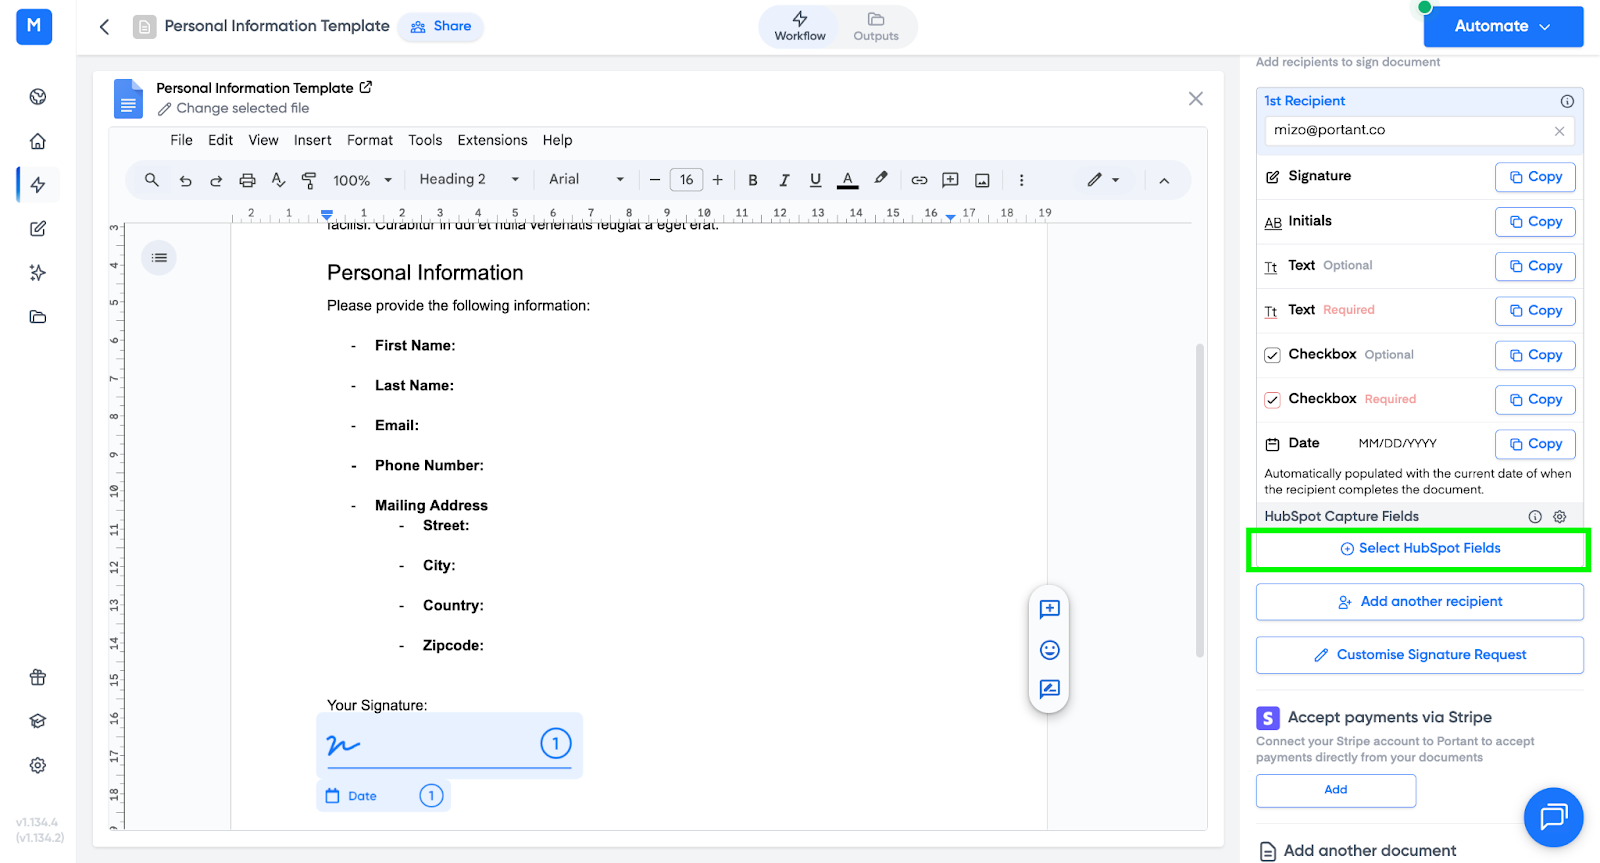
1. Add HubSpot capture fields to your workflow
With your workflow set up and a signature request added, open the Template block.

In the signature settings, find HubSpot Capture Fields at the bottom of the table and click it to open the configuration panel.
2. Pick the HubSpot object to update
Choose where the captured data should be stored:
- Primary object - the deal, contact, company, ticket or custom object the workflow runs on.
- Contact - the signature recipient's contact record.
Pick the one that matches where the information belongs.
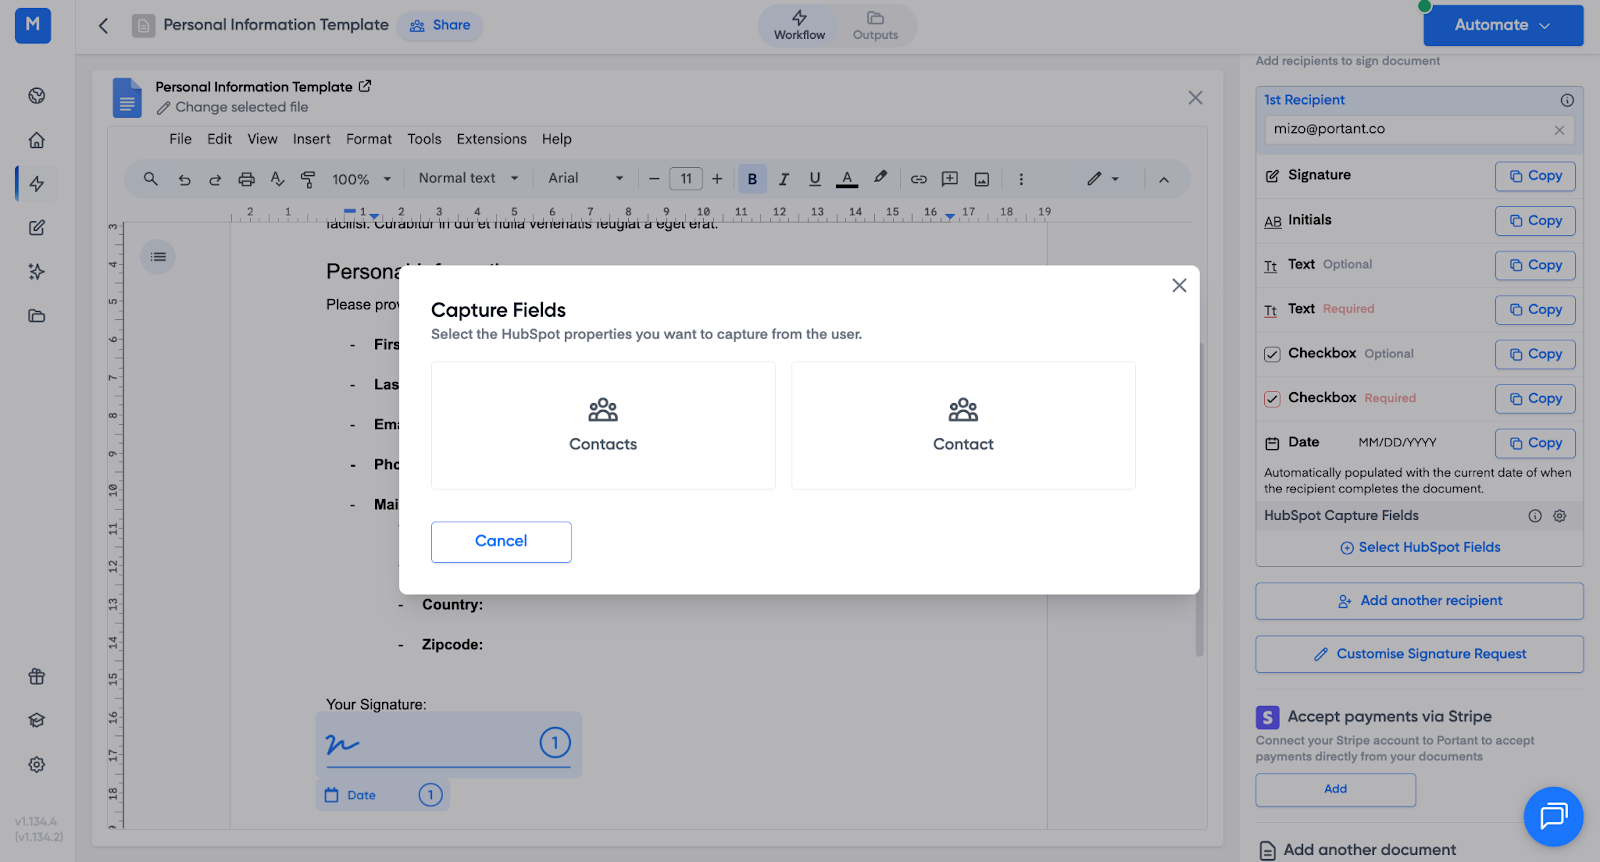
Portant lists every property on the selected object.
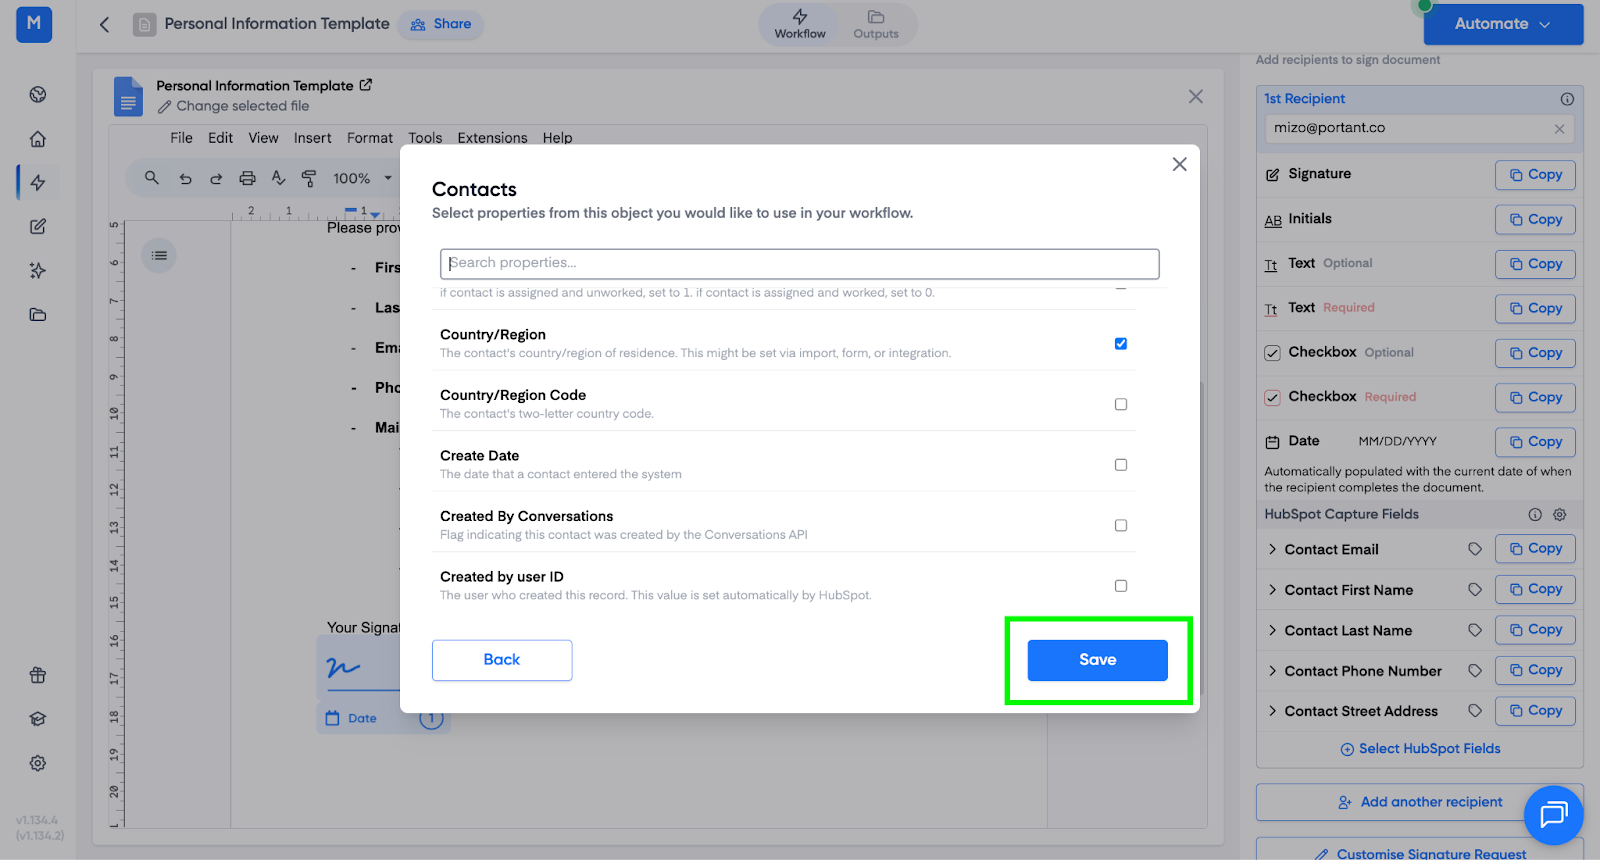
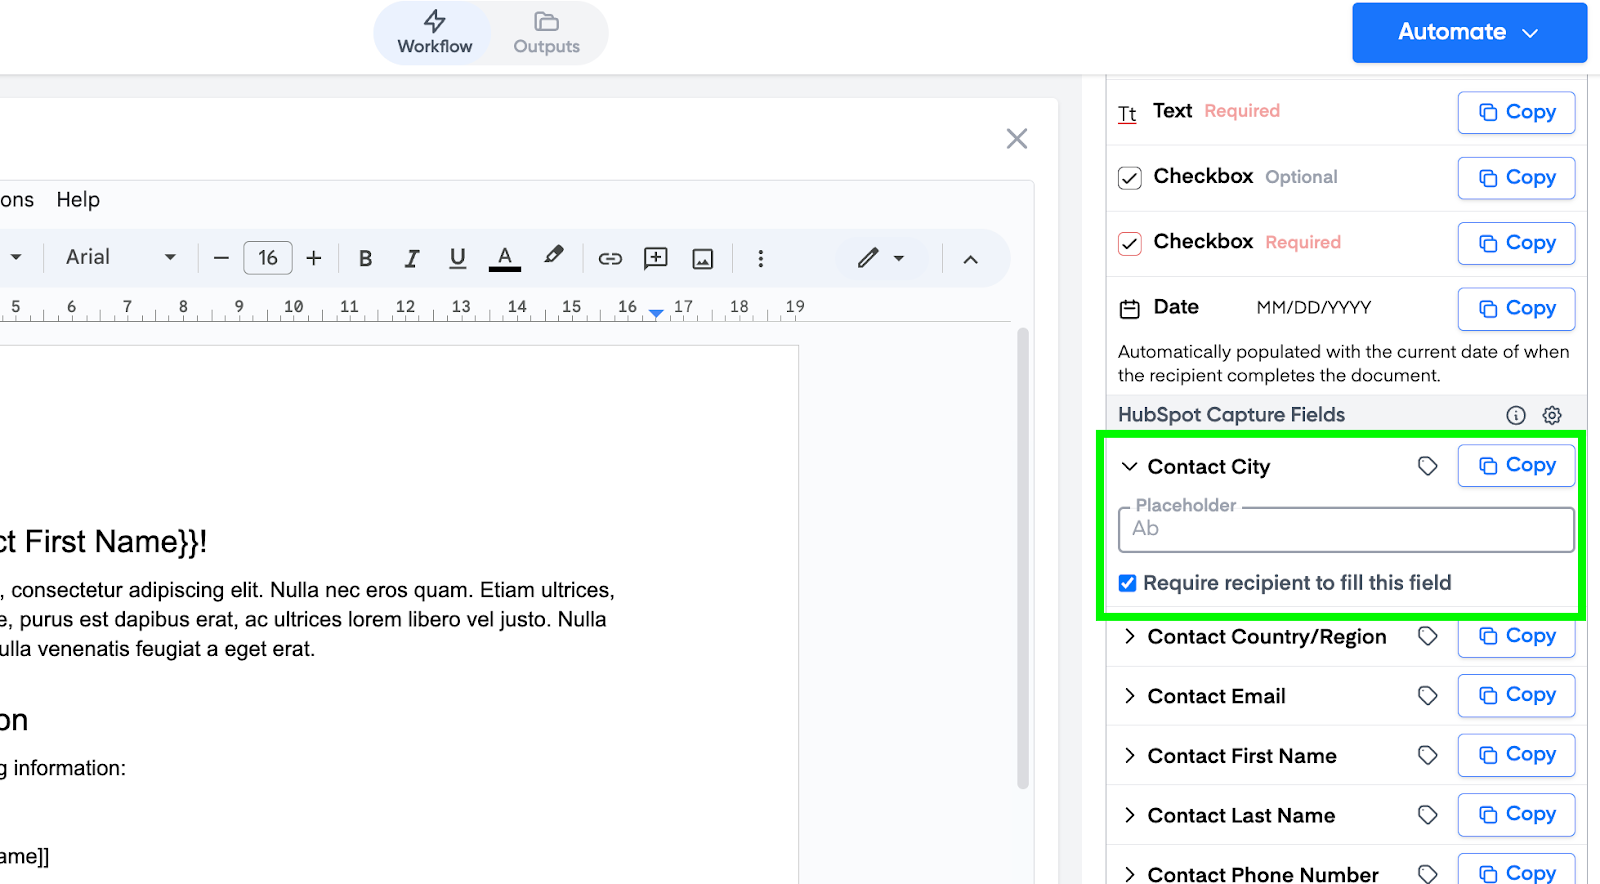
3. Choose the properties to capture
Tick every property you want the signer to fill in. There's no limit.
For example:
- Delivery Address
- Start Date
- Contact Phone Number
- Contact First Name
Click Save.
The selected properties now show up in the HubSpot Capture Fields section of the workflow.
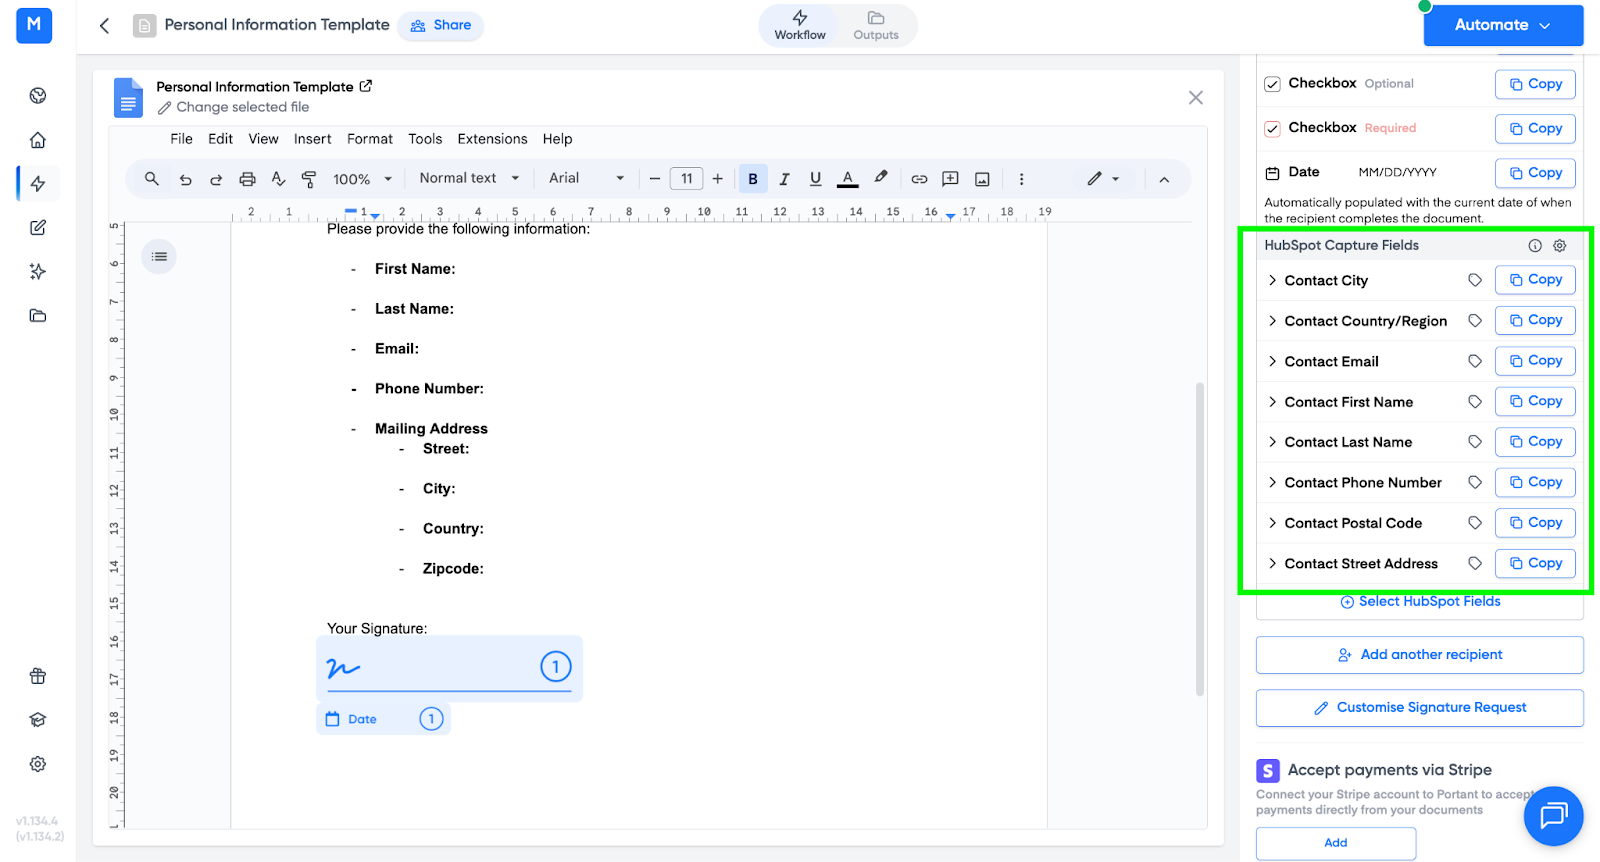
4. Insert the capture field tags into your template
Each capture field has a Copy button next to it. Click Copy, then paste the [[tag]] into your signable template wherever you want the signer to fill the field.
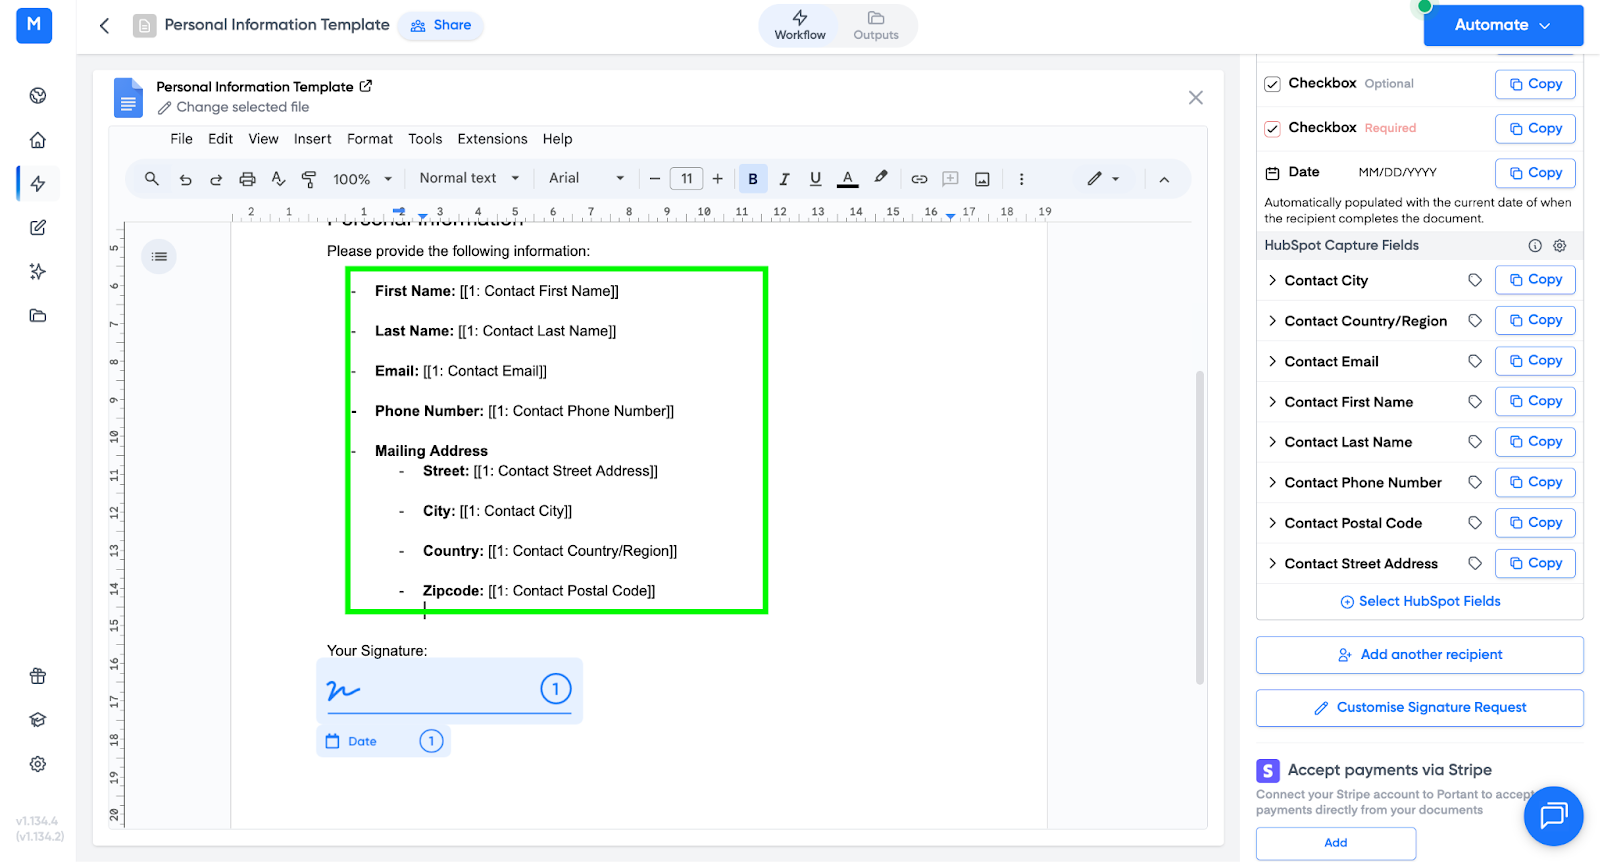
You can mark each property as required or not required, and you can add placeholder text that shows in the empty input field.
5. Control the field appearance
You can set a maximum field length so each field takes up the same amount of space in the document. Add :number at the end of the tag name, before the closing brackets.
For example, change [[1: Contact First Name]] to [[1: Contact First Name:20]] to cap the field at 20 characters.
Note: if a field is a HubSpot picklist, you can drop it into the signable document too. The signer picks one of the available options from the list during the signing flow.
6. HubSpot updates automatically
Once your tags are placed:
- Run a test, or trigger your workflow as normal.
- Portant generates a signable document with the capture fields included.
The signer fills in the fields during the signing flow.
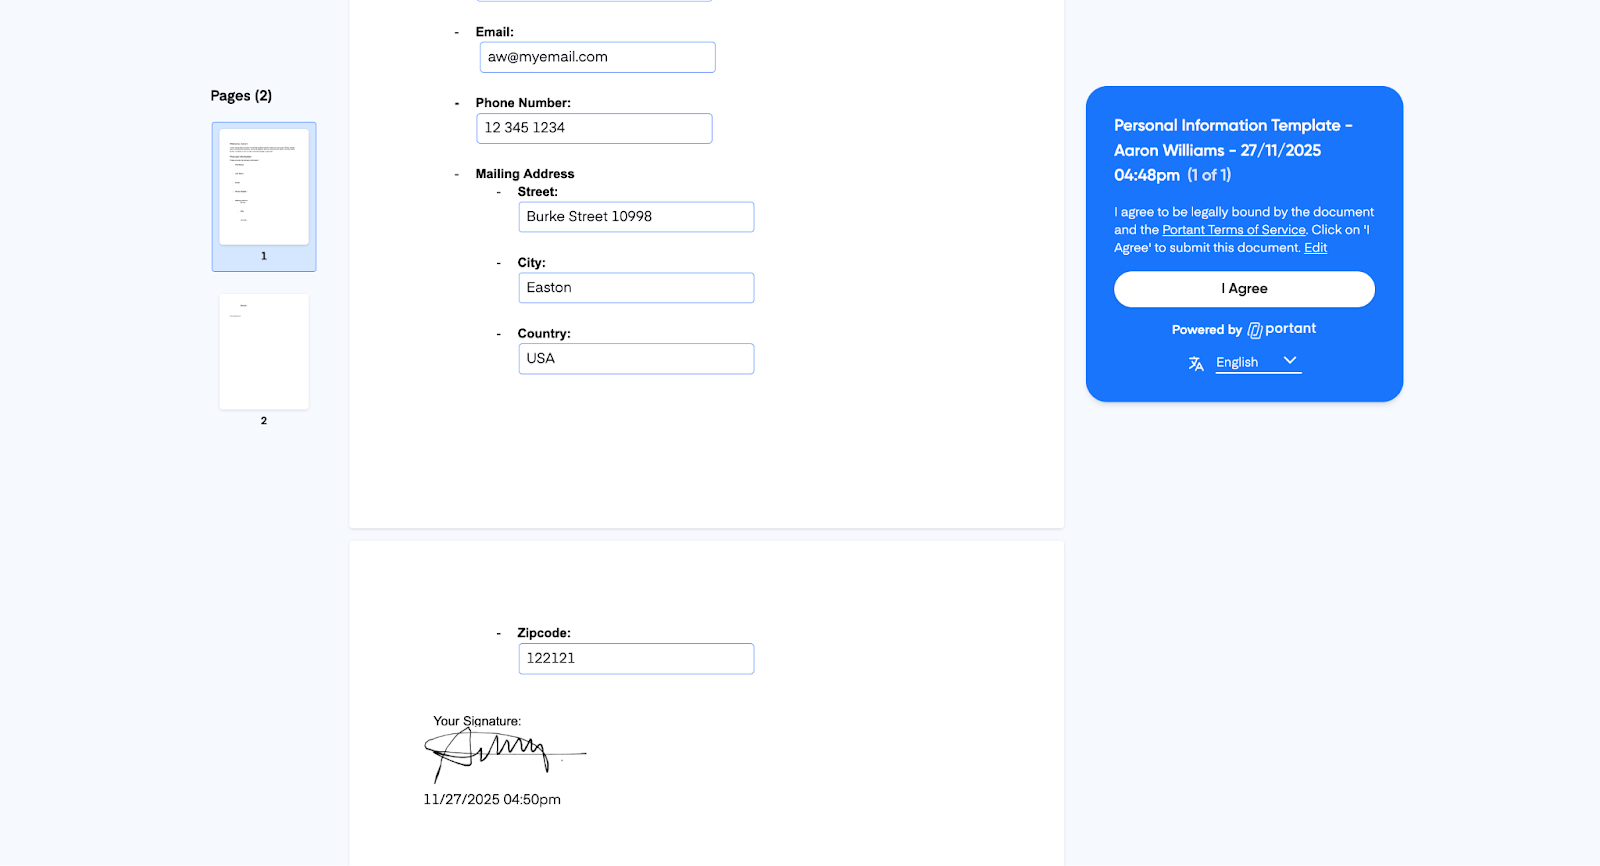
When they submit, a signed copy with the captured data is stored, and each field's value is written back to the matching HubSpot property on the record.
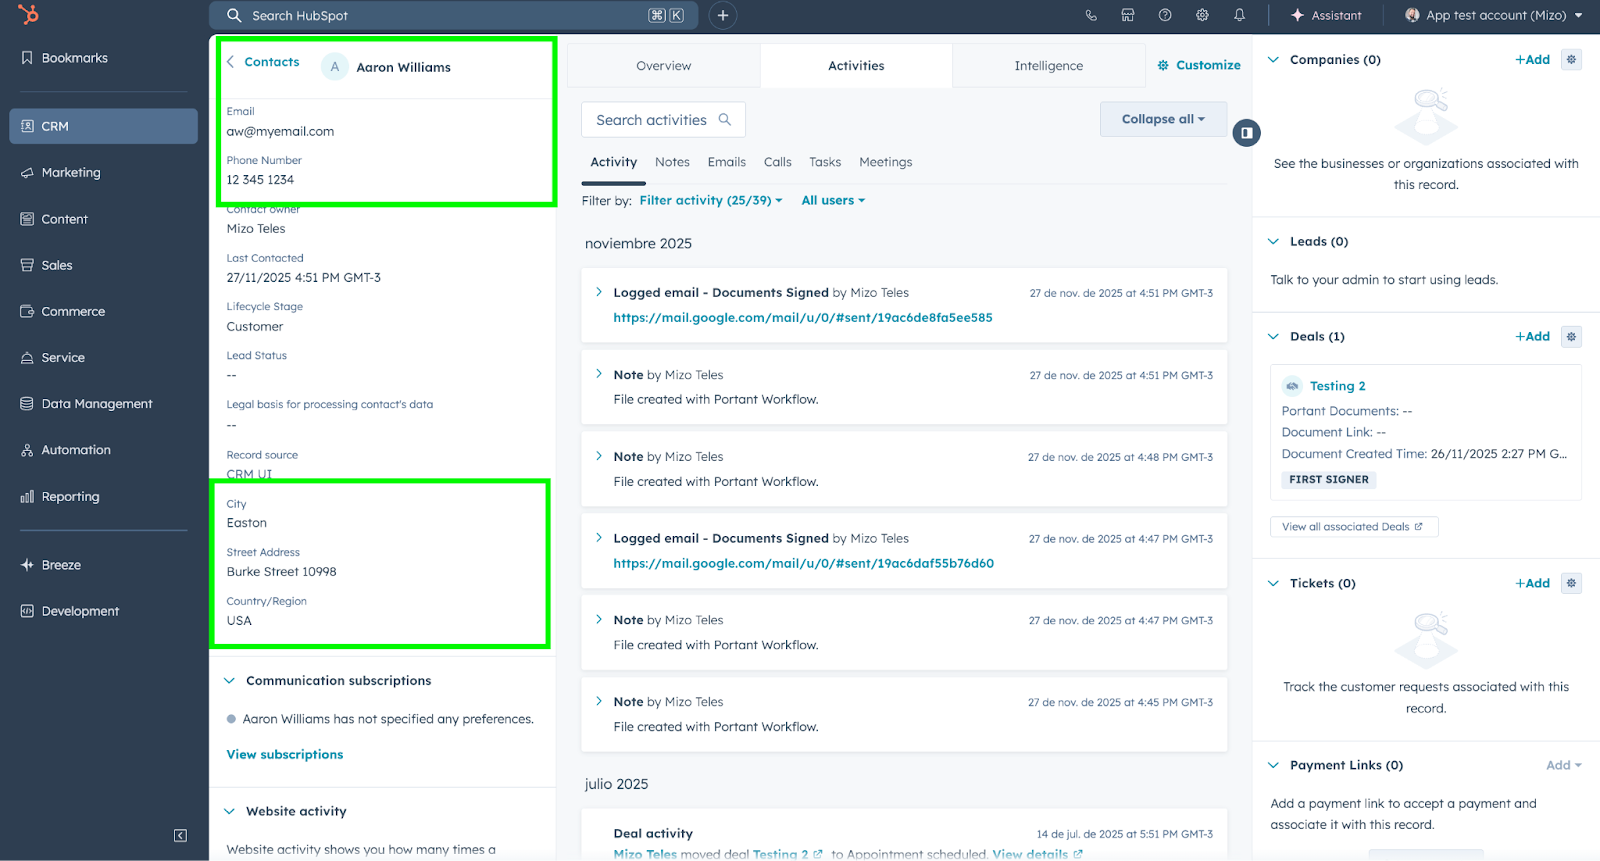
That's it: signers fill in the fields, HubSpot stays up to date.