Signature requests
Set up a workflow that sends a document for signature on every new row in your source. This is the long-form walk-through: picking a source, customising the document with tags from the source, adding signature placeholders, editing the request and confirmation emails, and turning automation on.
If you've already got a workflow with a document template and just want the signature steps, see Get started with eSignatures.
What you'll do
- Create a new workflow
- Pick a source
- Customise the document with data from the source
- Add the signature placeholders
- Edit the signature request email (optional)
- Edit the signature confirmation email (optional)
- Turn the workflow on and test it
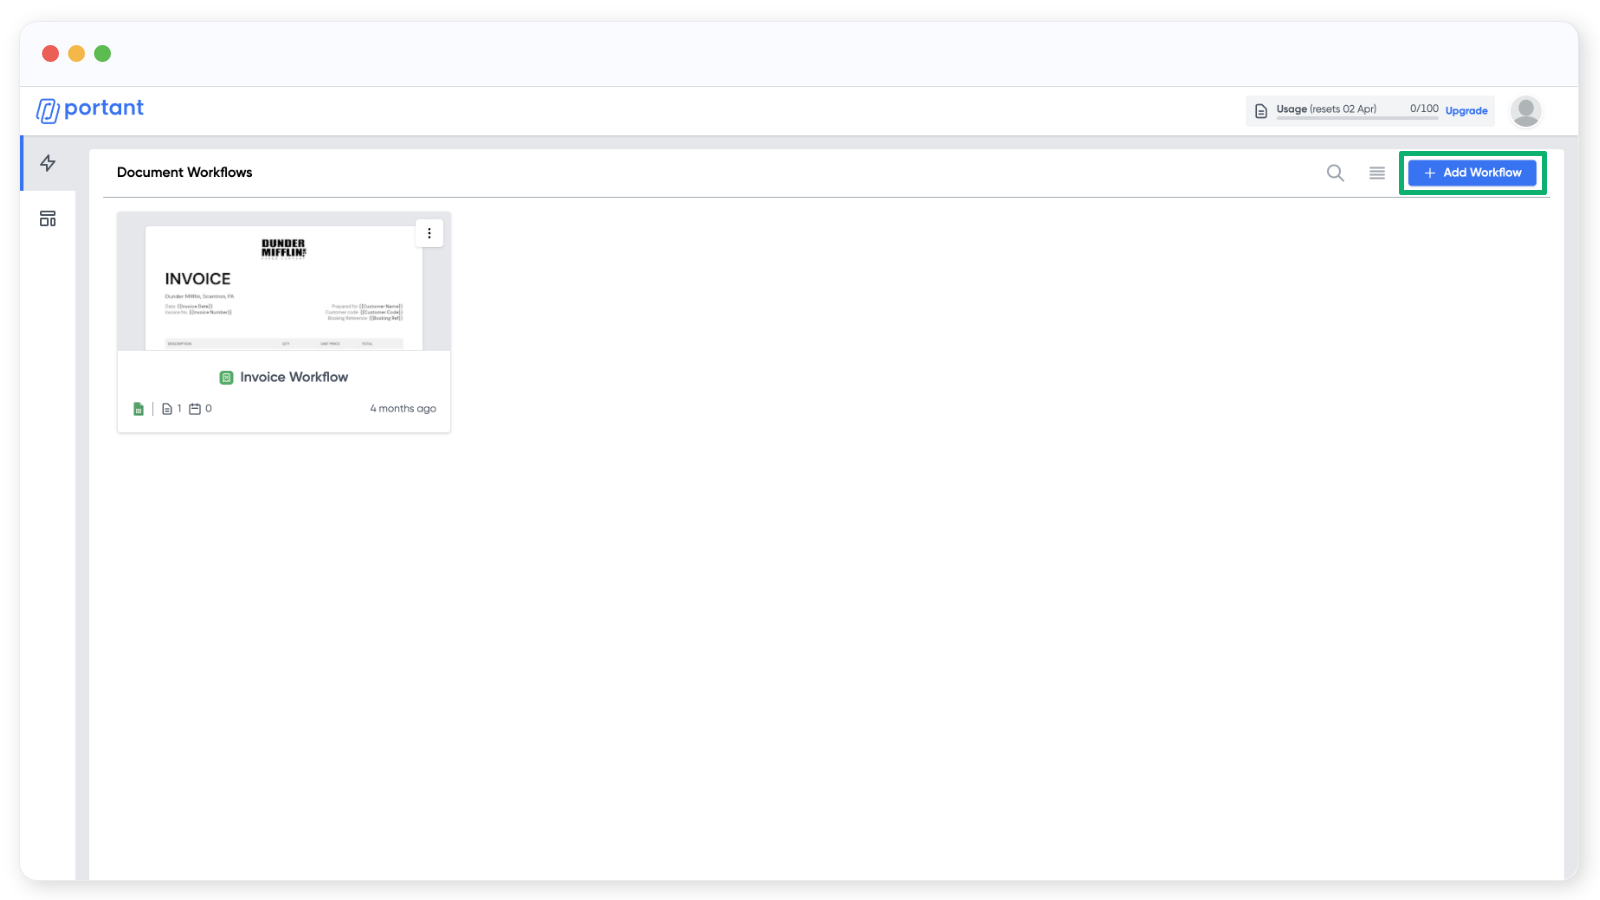
1. Create a new workflow
Click + Add Workflow in the top right of the Portant app.
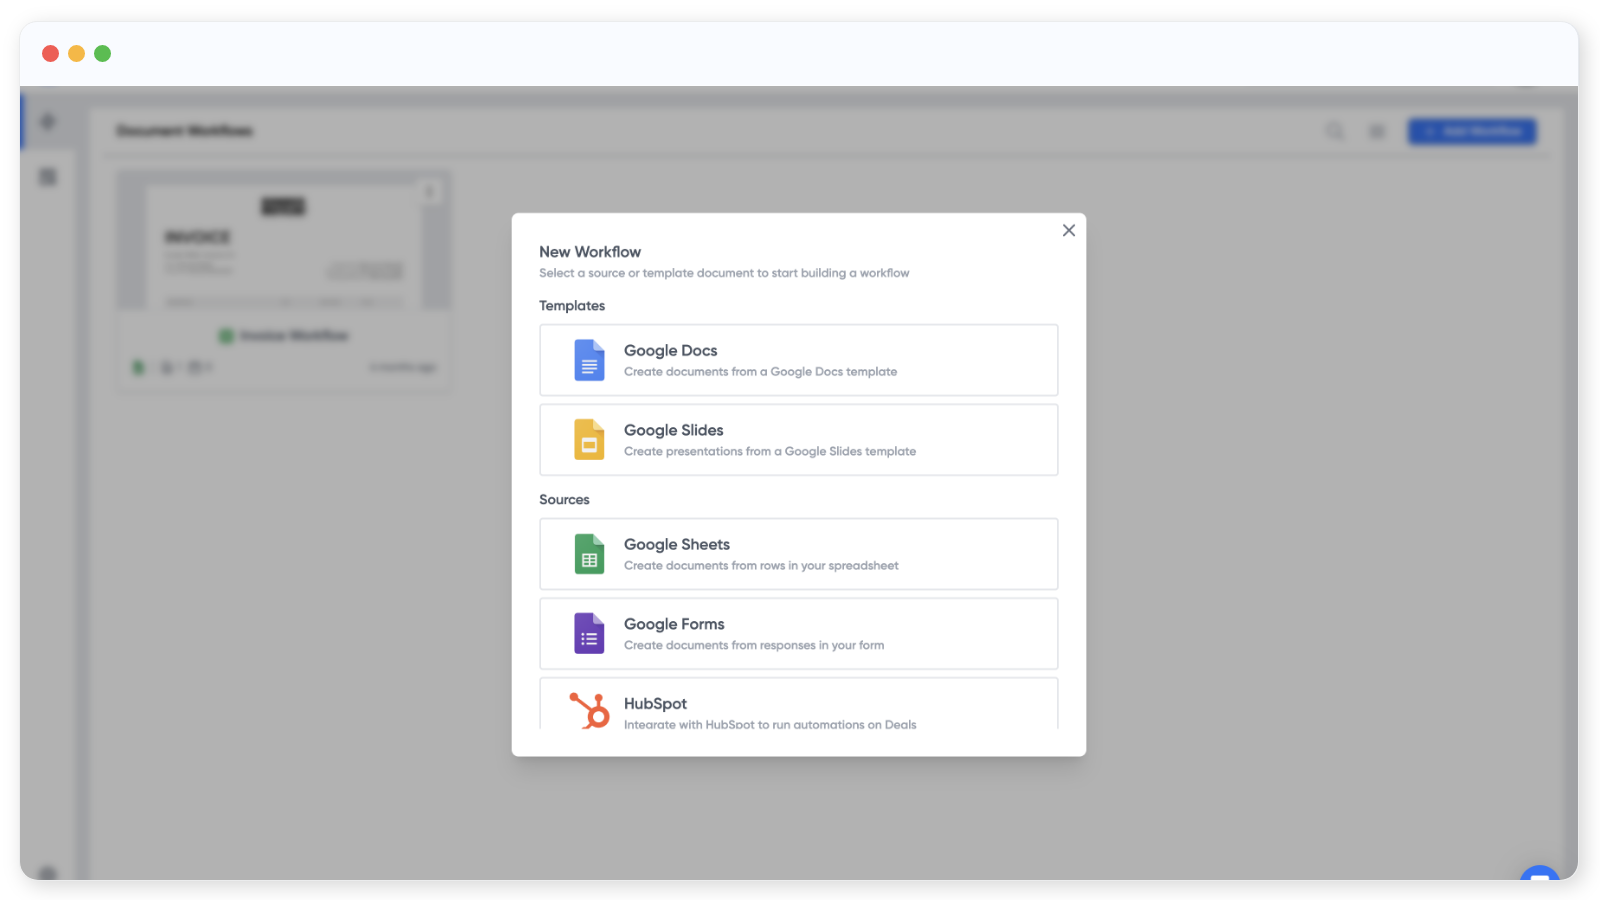
2. Pick a source
Choose a source or a document template to start from. We'll use a Google Form here, but any source type works the same way.
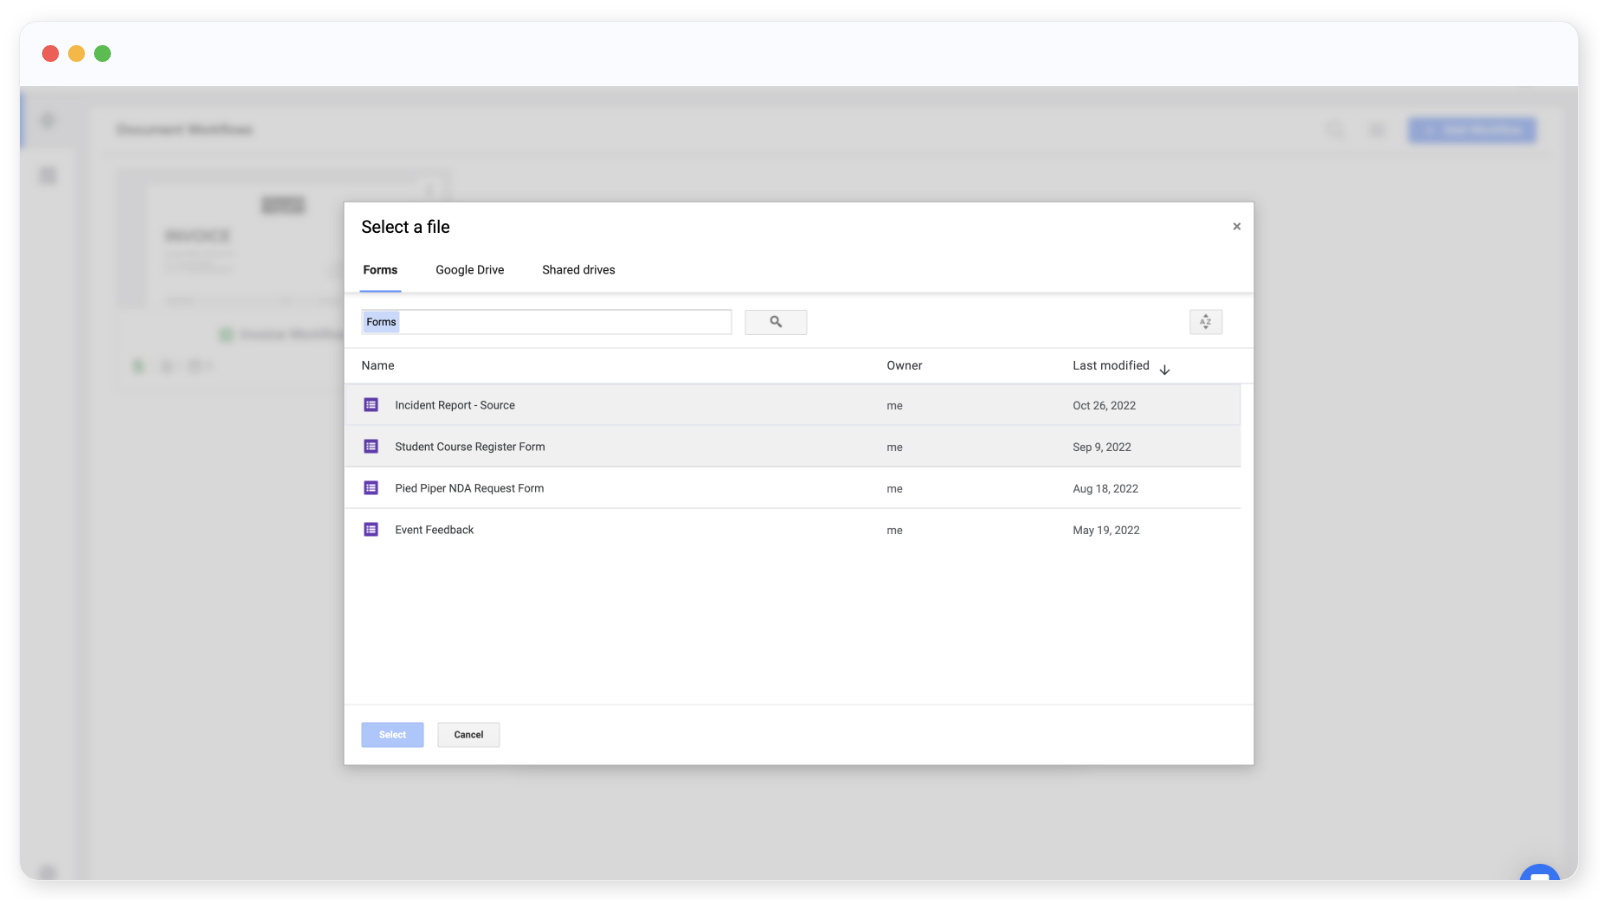
Pick a Google Form from your Drive, or let Portant create a new one.
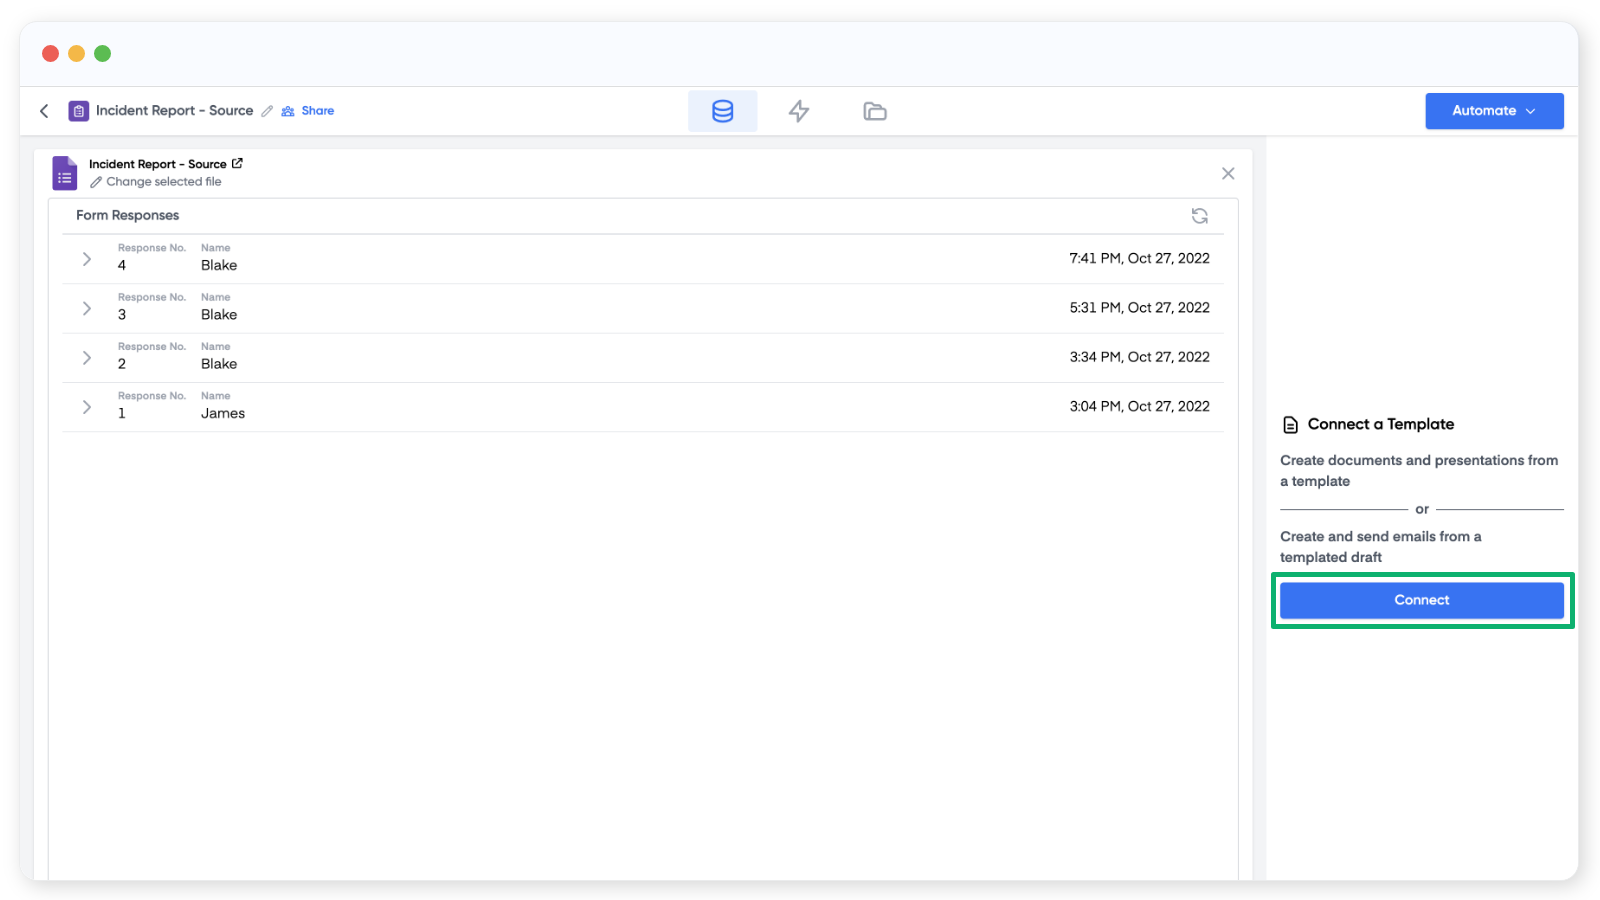
Once it's connected, Portant shows the form responses. If there aren't any yet, this section will be empty. From here you can open the form to edit questions or copy the public link.
Note: Click ✎ Change selected file under the form name to swap in a different Google Form.
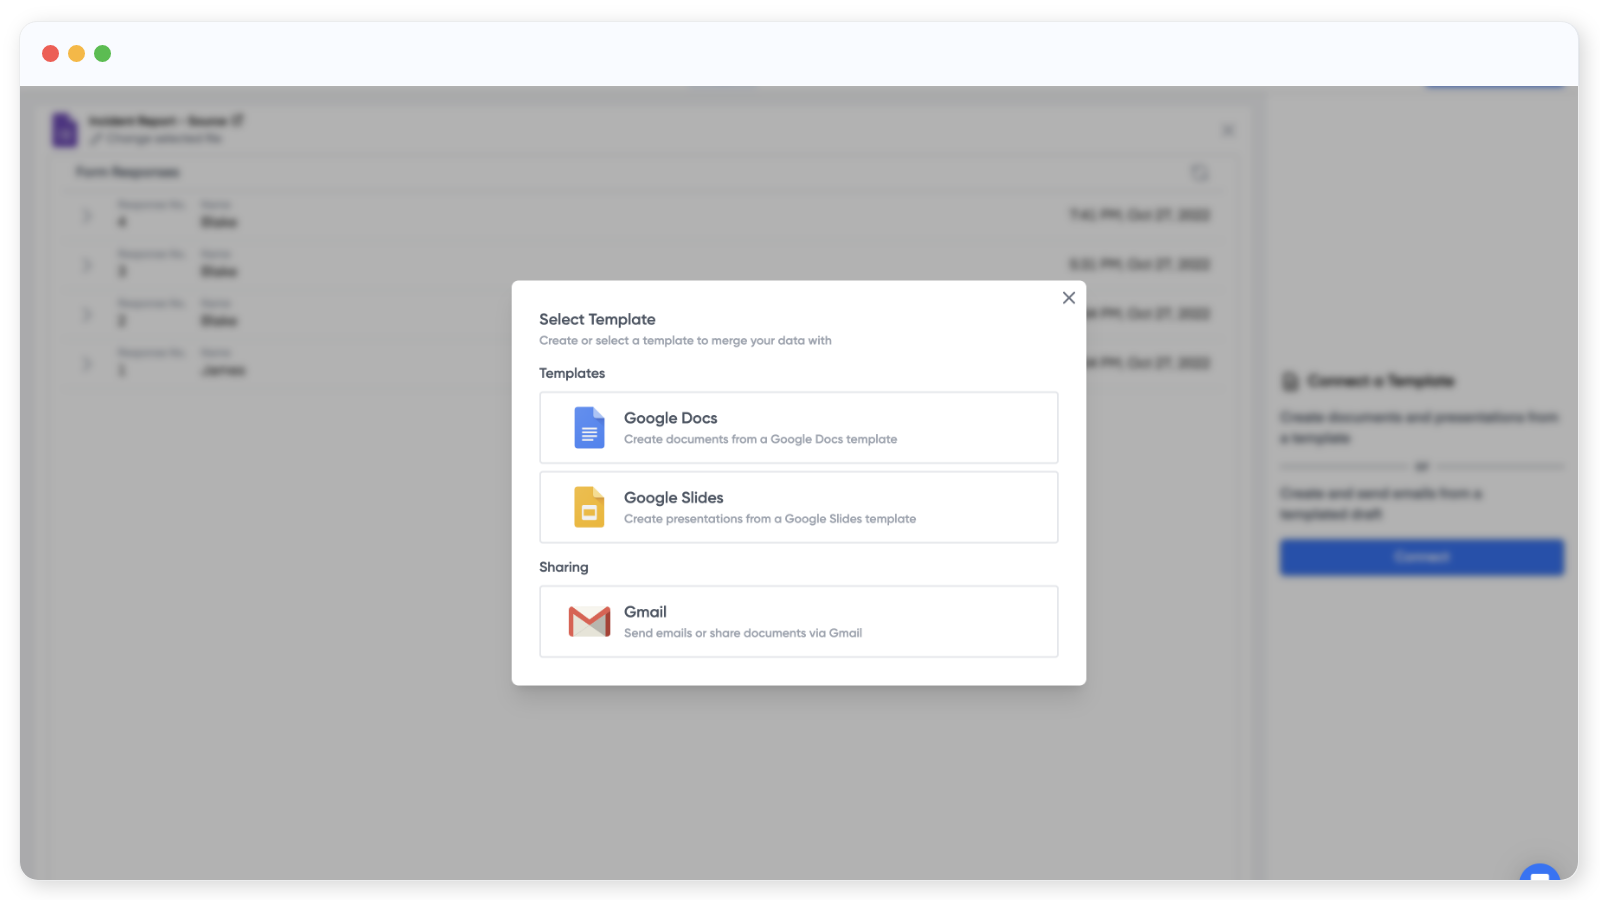
3. Customise the document
Click Connect on the right side to add a template document.
Pick Google Docs or Slides, then either create a new file or select an existing one.
Portant opens the document so you can drop in source fields.
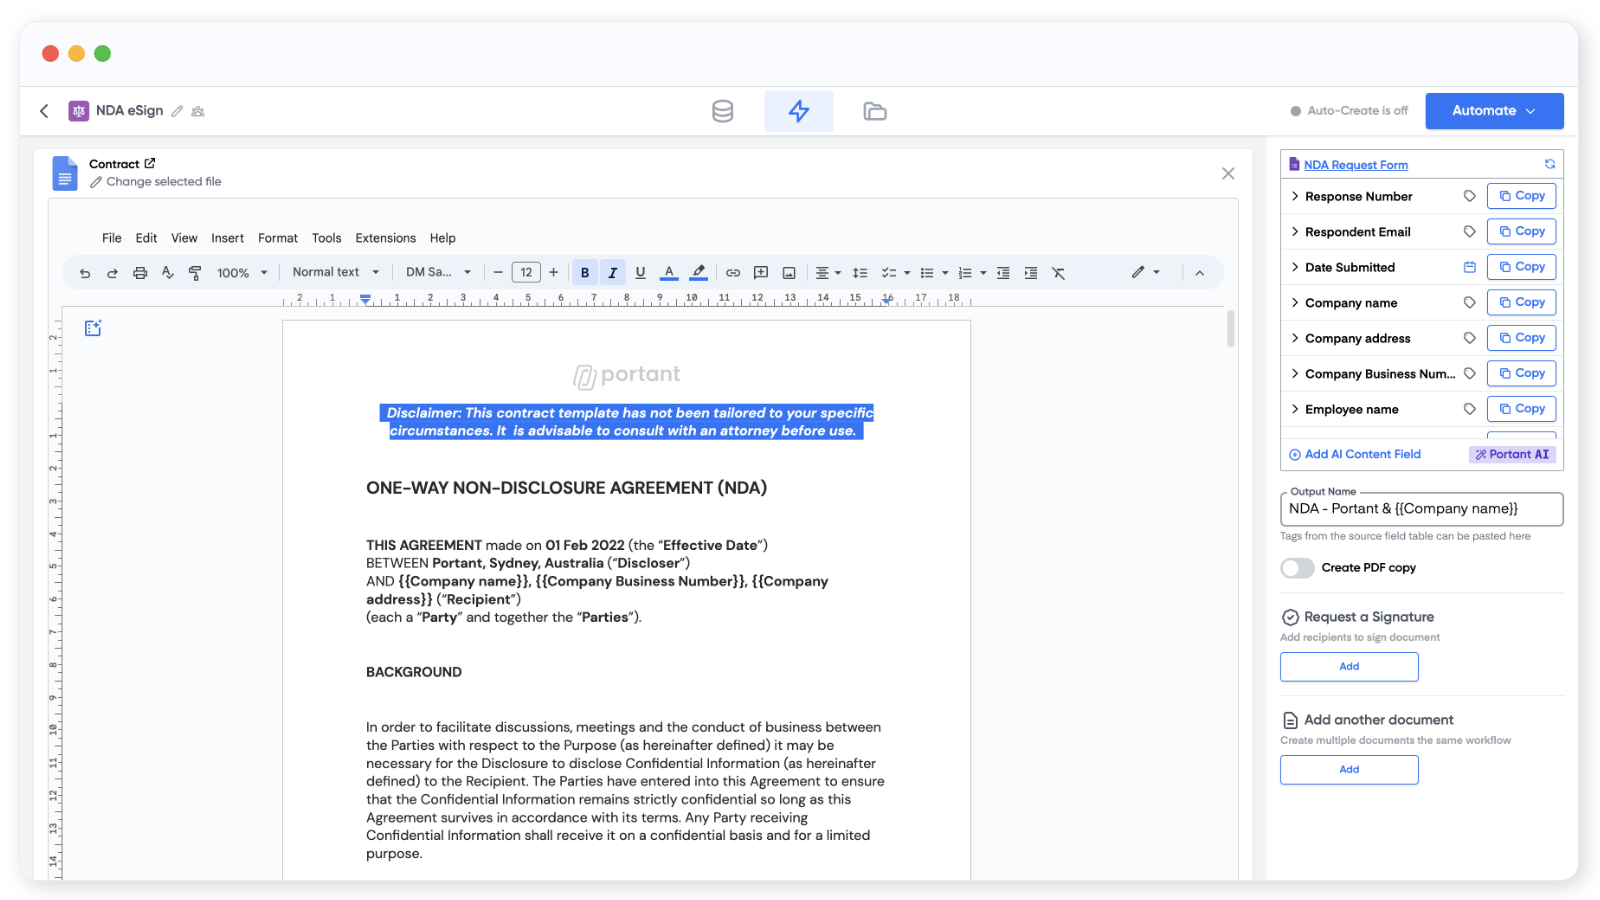
The top right of the page shows your source table, with every question or column from the source.
To insert a value into the document, click Copy next to the field and paste the {{tag}} where you want it.
You can also add image tags, and customise tag formatting by clicking the row.
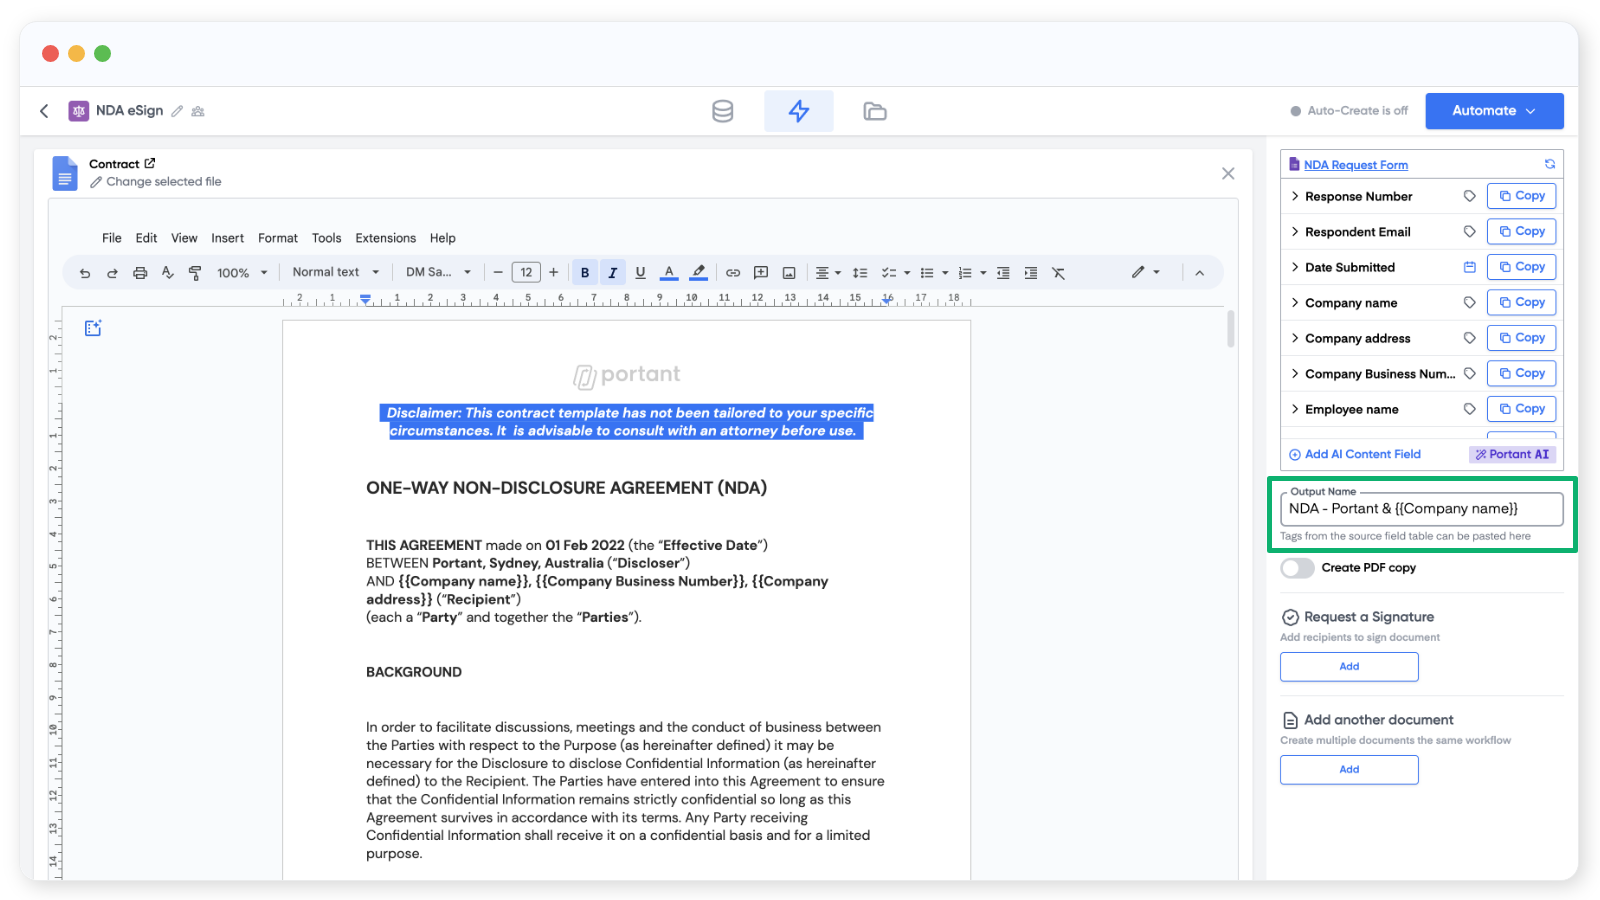
When the document is ready, set the output file name by adding tags to the Output Name field.
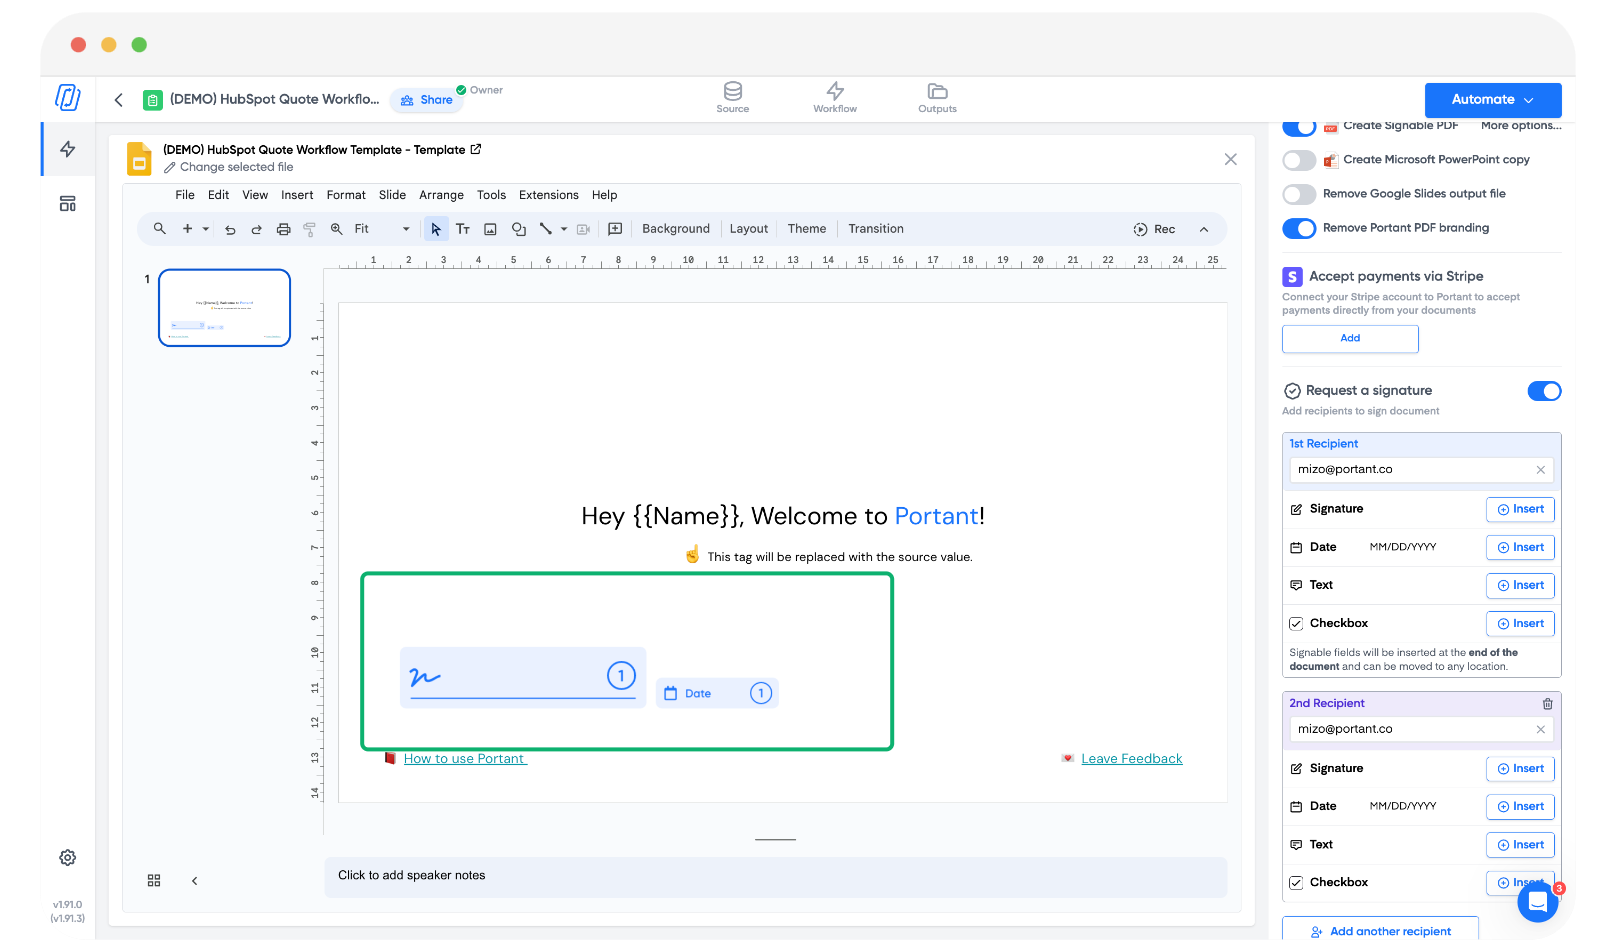
4. Add the signature placeholders
Below the Output Name field, click the button to request a signature.
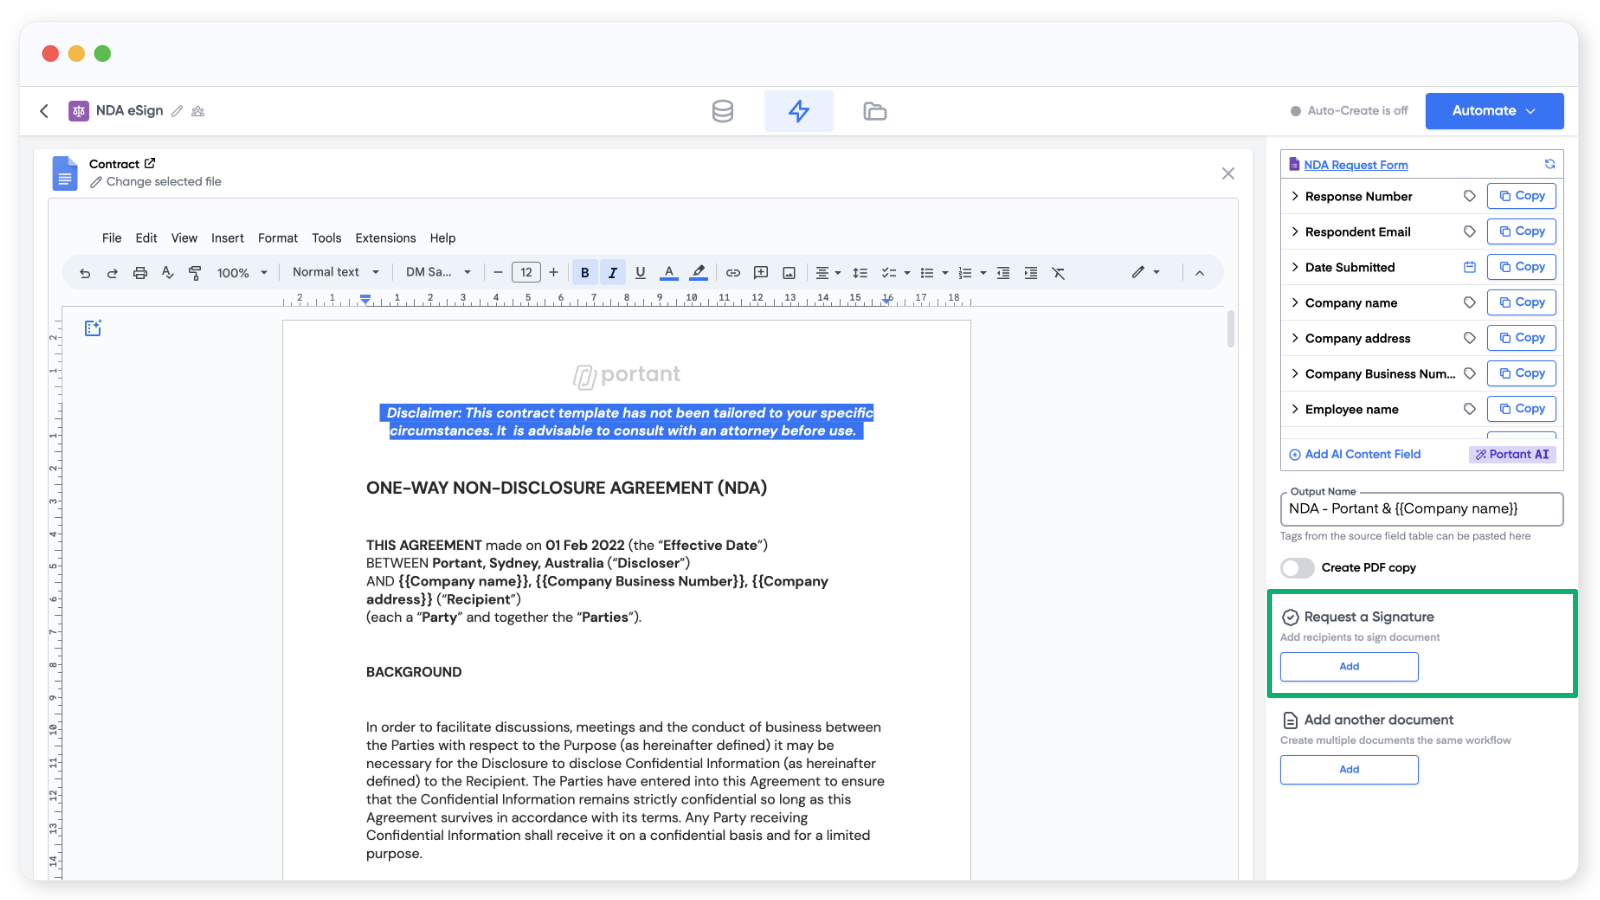
Three signature settings appear:
- The email address of the recipient. A
{{tag}}from your source, or a typed email likejames@portant.co. - The Signature placeholder. An image you drop into the document.
- The Date placeholder. An image for the date the document was signed.
Note: You can also add Text Field, Checkbox, Date, and Initials placeholders, and choose whether each is mandatory.
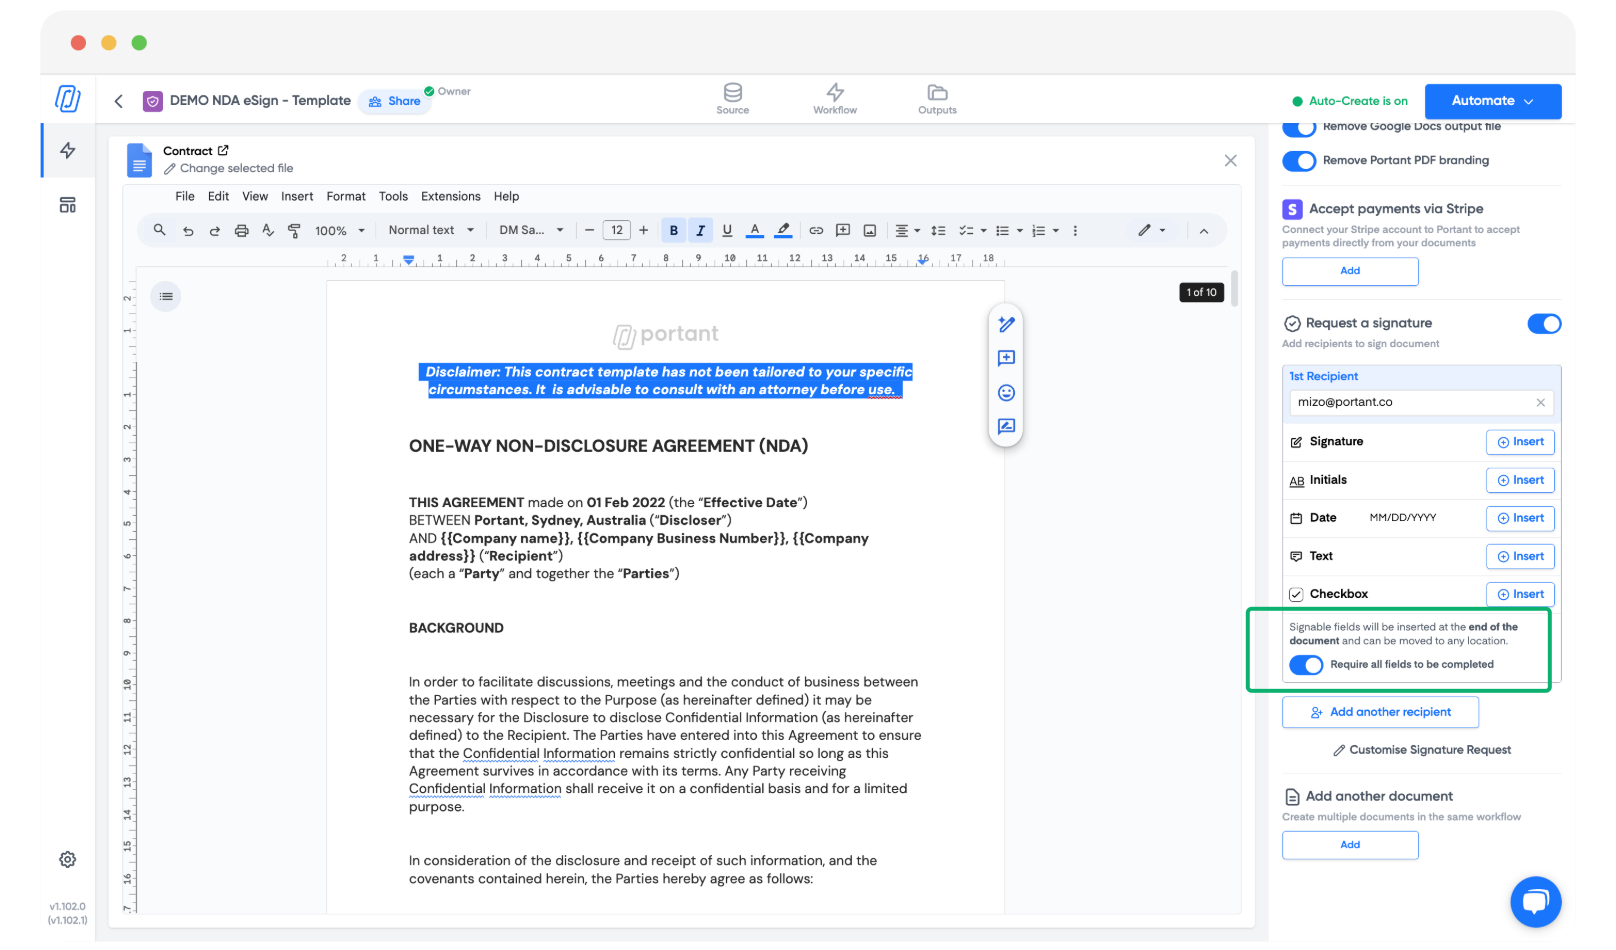
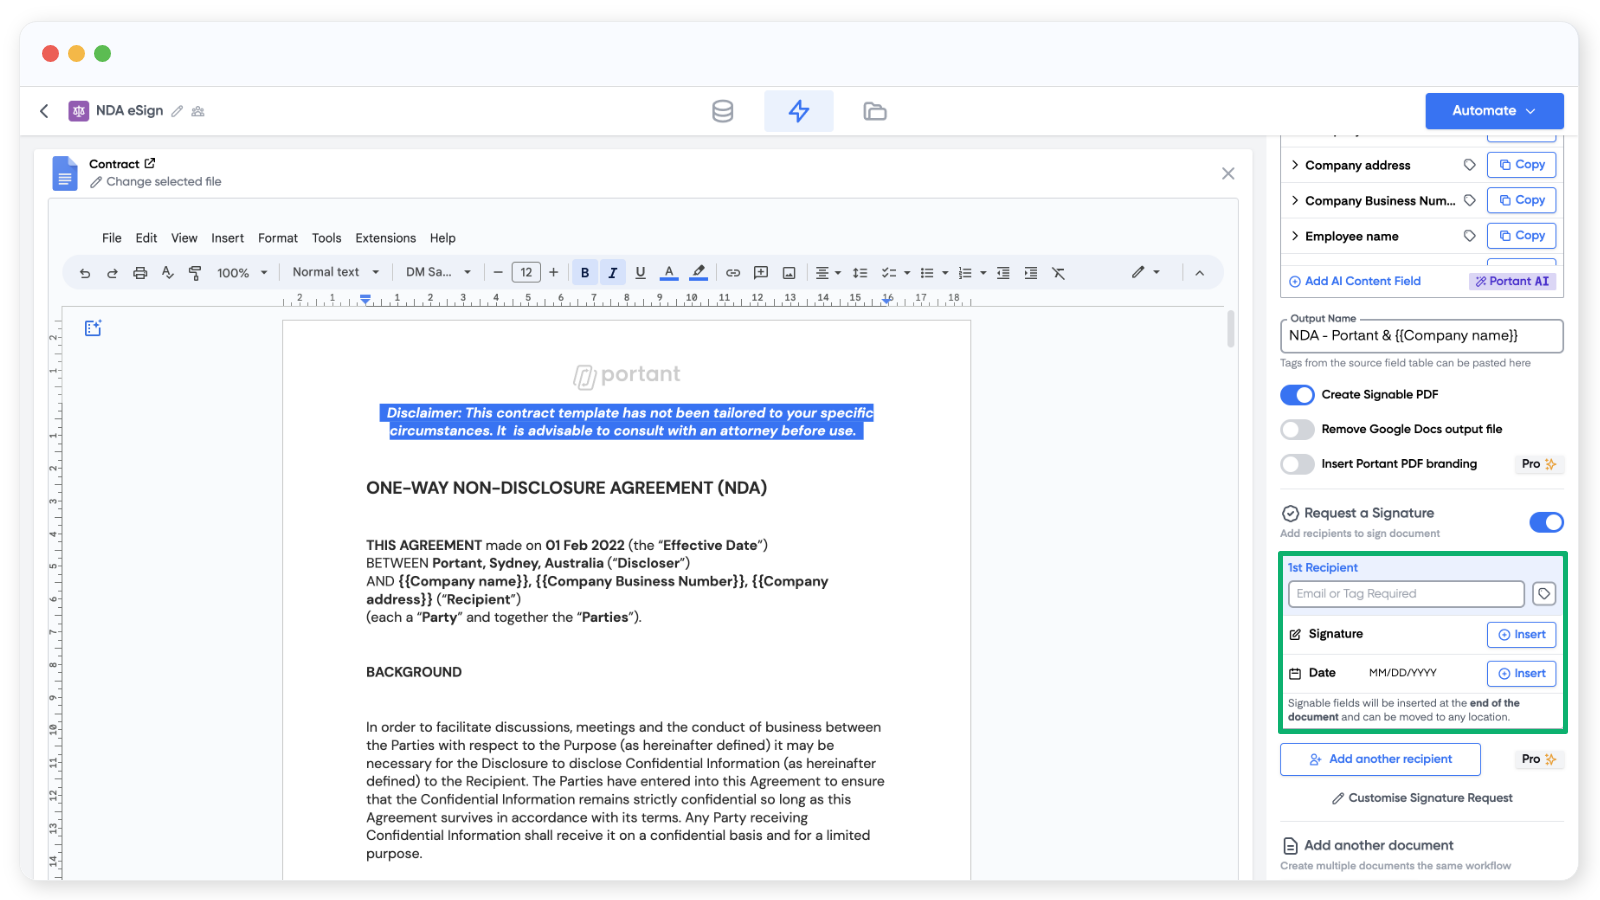
Add the recipient's email
Click the tag button to the right of the email box to pick a field from your source, or type the address directly.
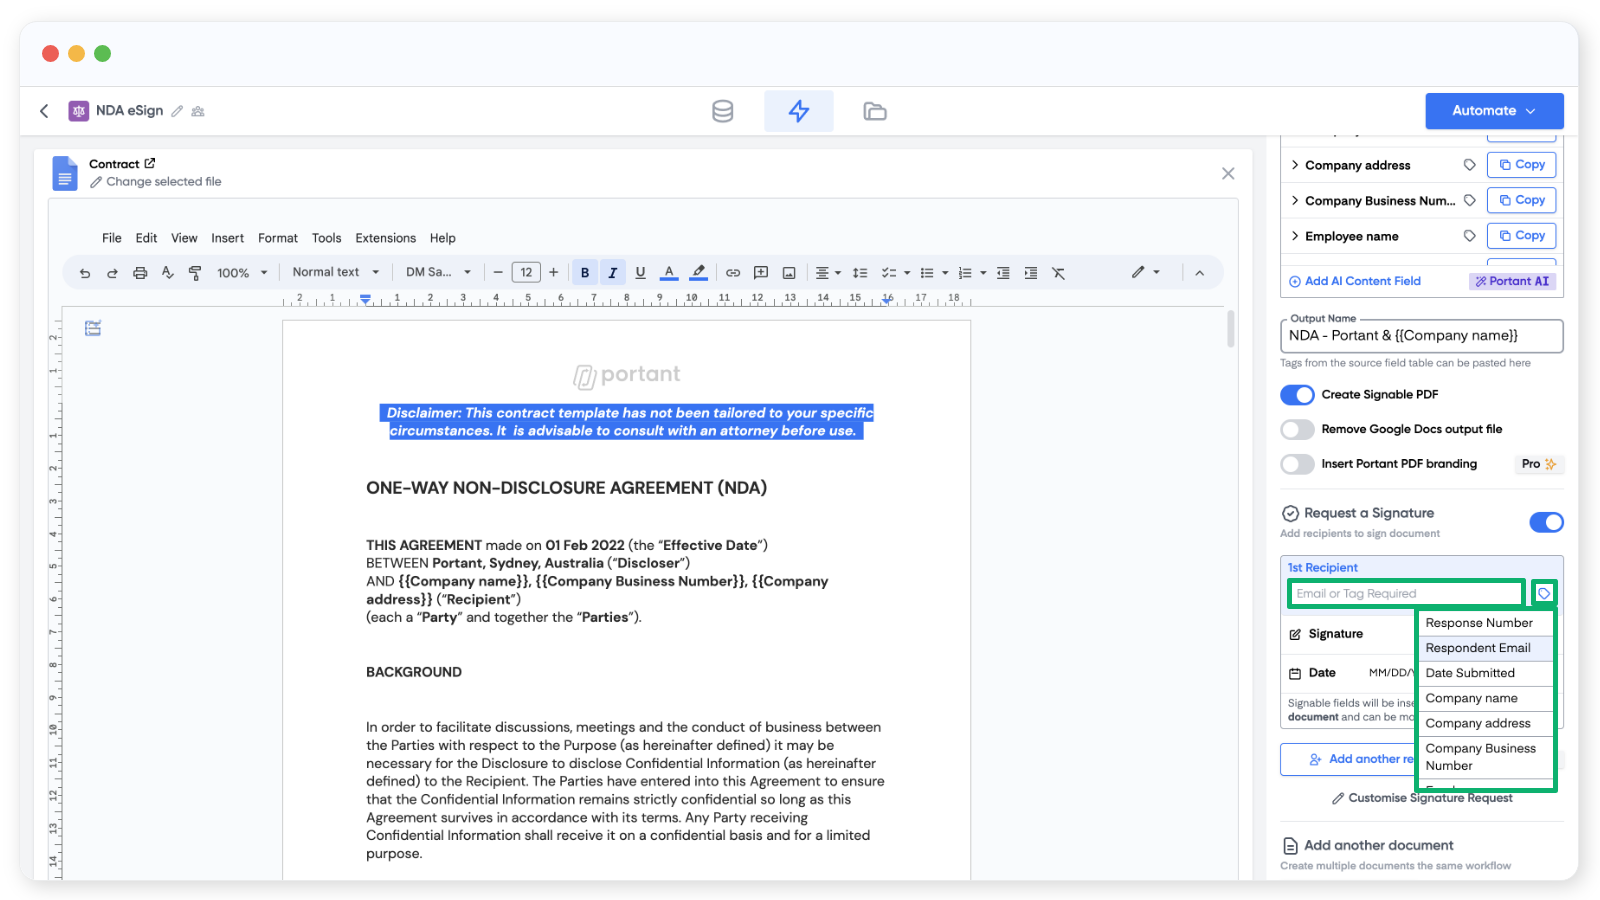
Note: If you're using Google Forms, the Respondent email field only works when you've turned on collect respondent email addresses in the form. Or use a question to collect the email manually.
Insert the signature placeholder
Click Insert next to Signature. The placeholder is dropped at the end of the document the first time, but you can move it anywhere afterwards.
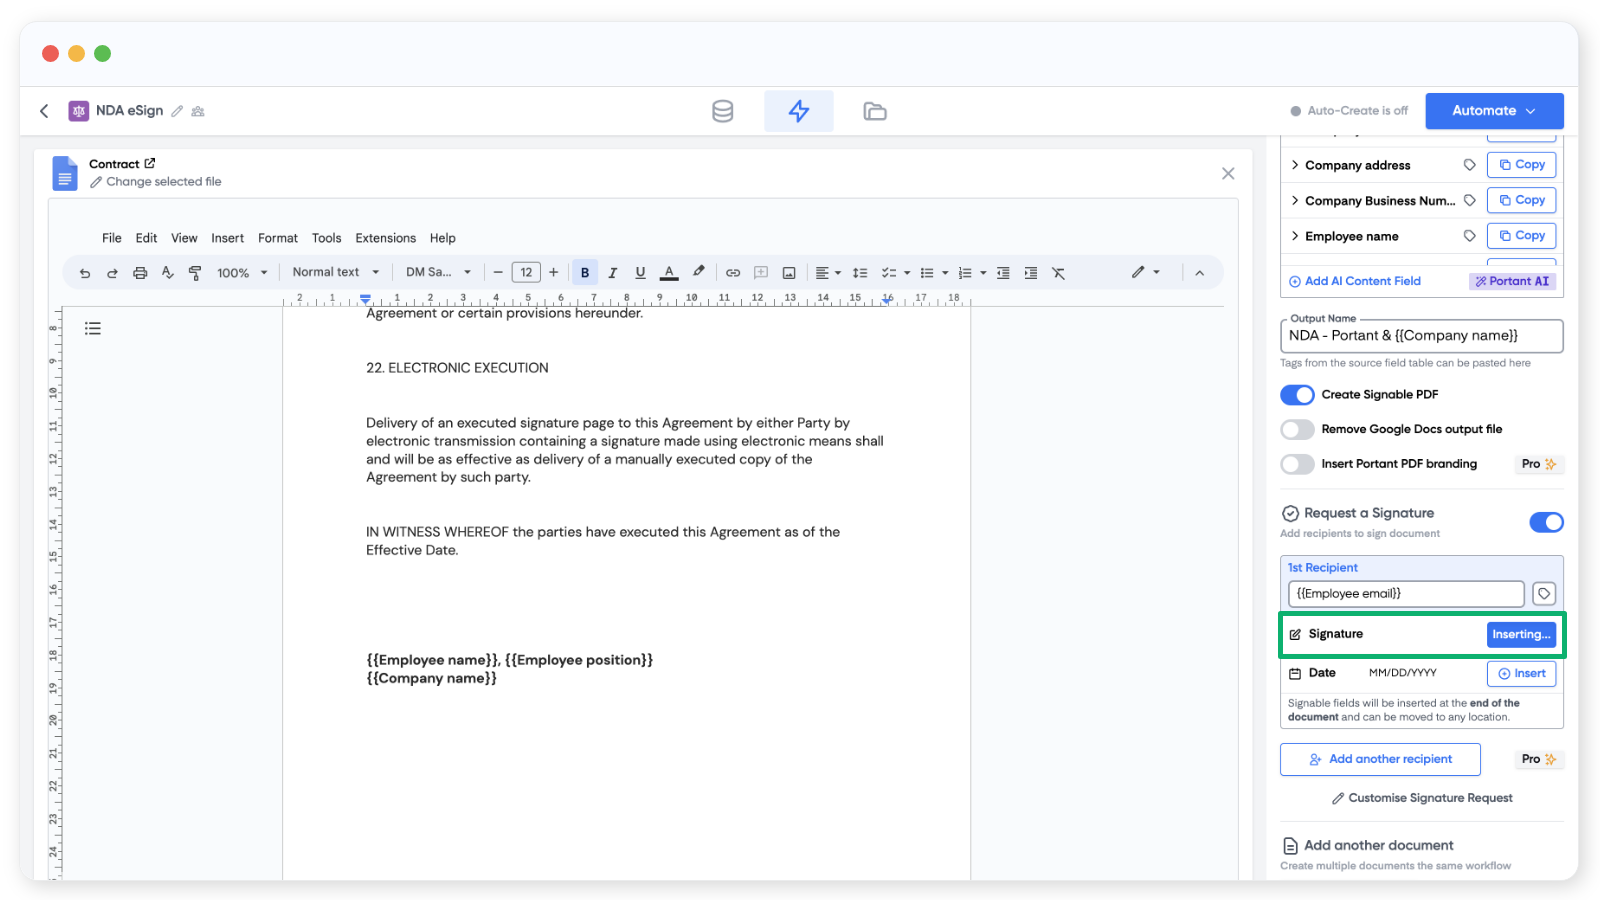
The placeholder is a regular image, so resize it to control how big the signature appears.
Note: Copy and paste the placeholder image to add the same signature in multiple places.
Insert the date placeholder
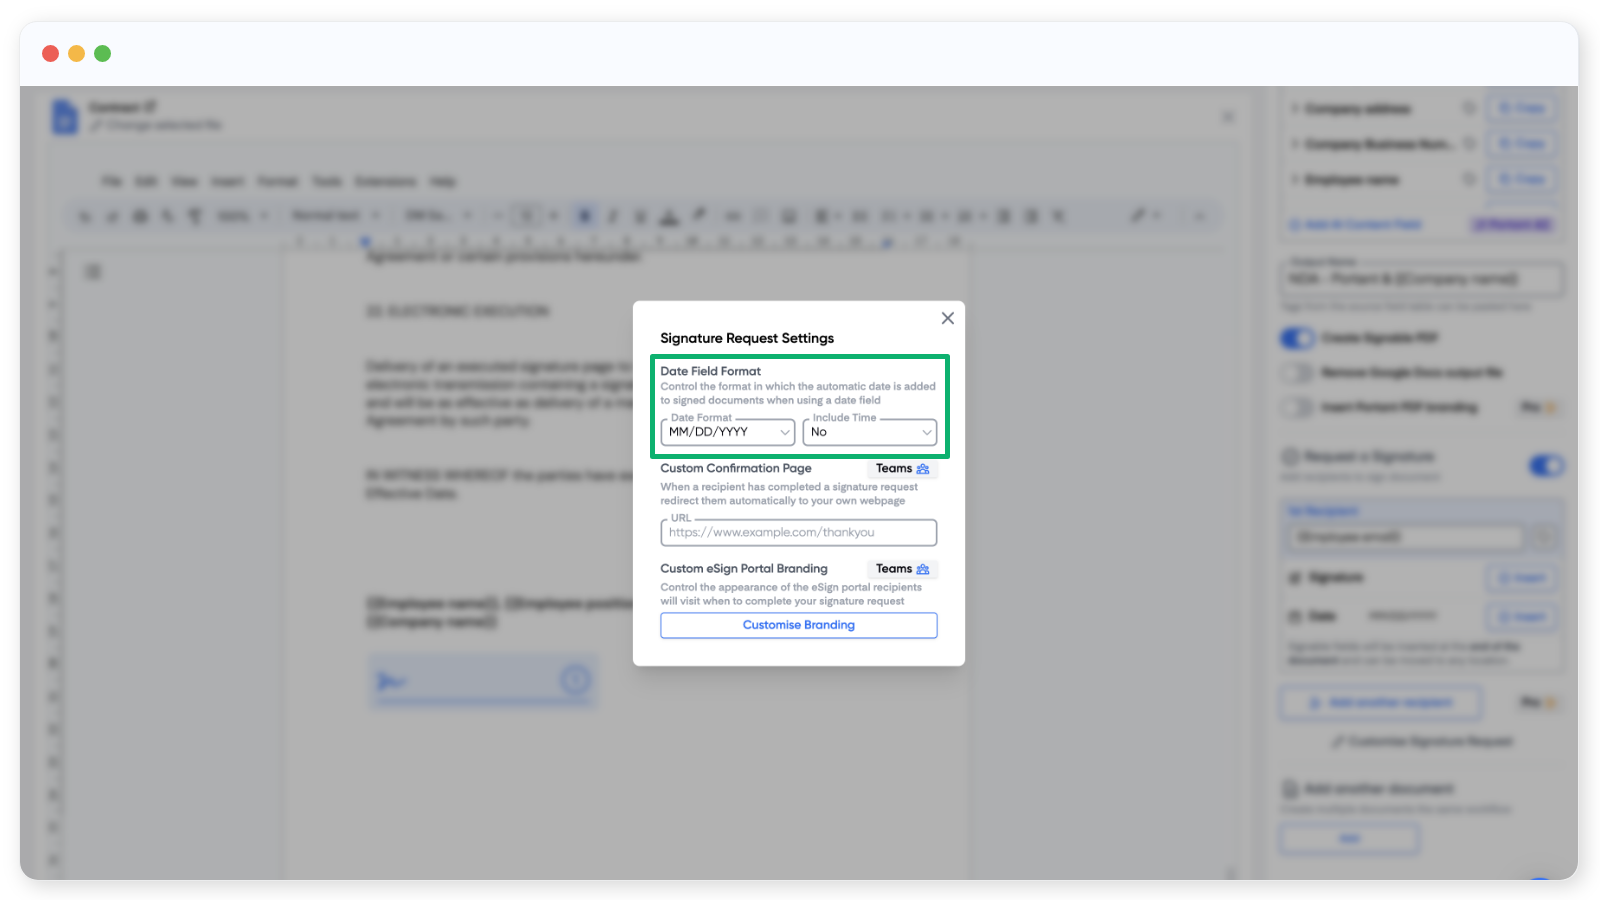
Same steps as the signature placeholder. To change the date format, click the format preview next to the date.

A modal opens where you can pick the format. Teams plans can also customise the eSigning portal's branding here.
Note: Signature and date placeholders work the same way in Google Slides templates.
If you need more than one person to sign, see Multiple signers (Pro and Teams plans).
Note: On free accounts, signed PDFs include a Portant watermark in the footer. To remove it, upgrade to Pro or Teams.
5. Edit the signature request email (optional)
Once your placeholders are in, head back to the workflow overview by clicking the lightning bolt icon at the top of the page. The signature request block sits below your document block.
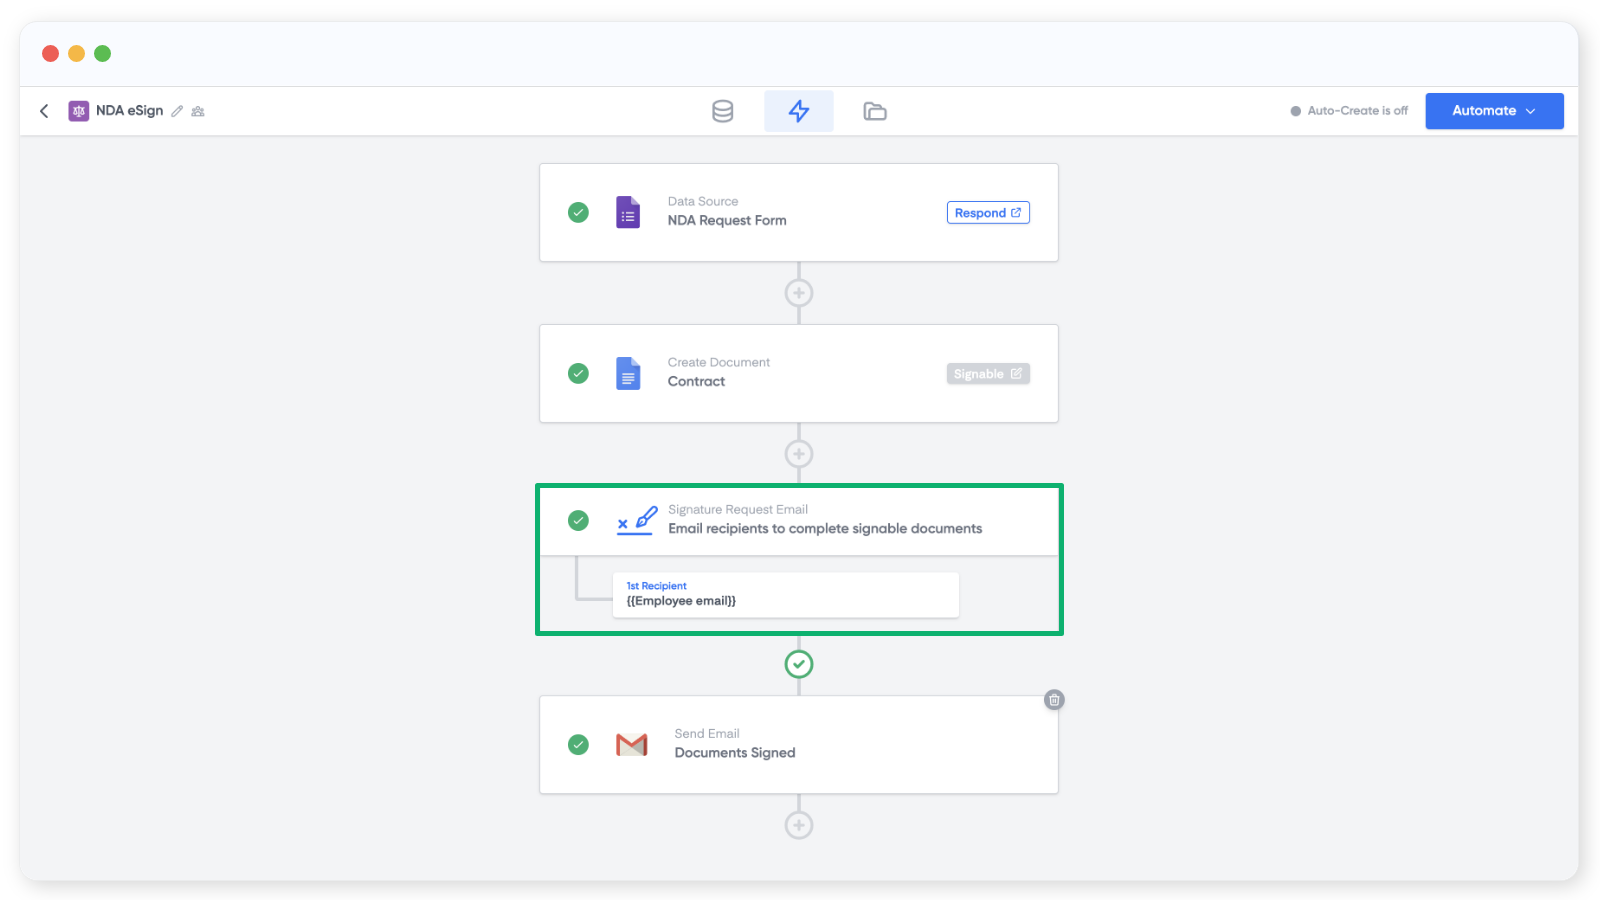
Click into the block to edit the Subject and Message fields. The To field is locked to the email address you set on the document. You can add {{tags}} to personalise.
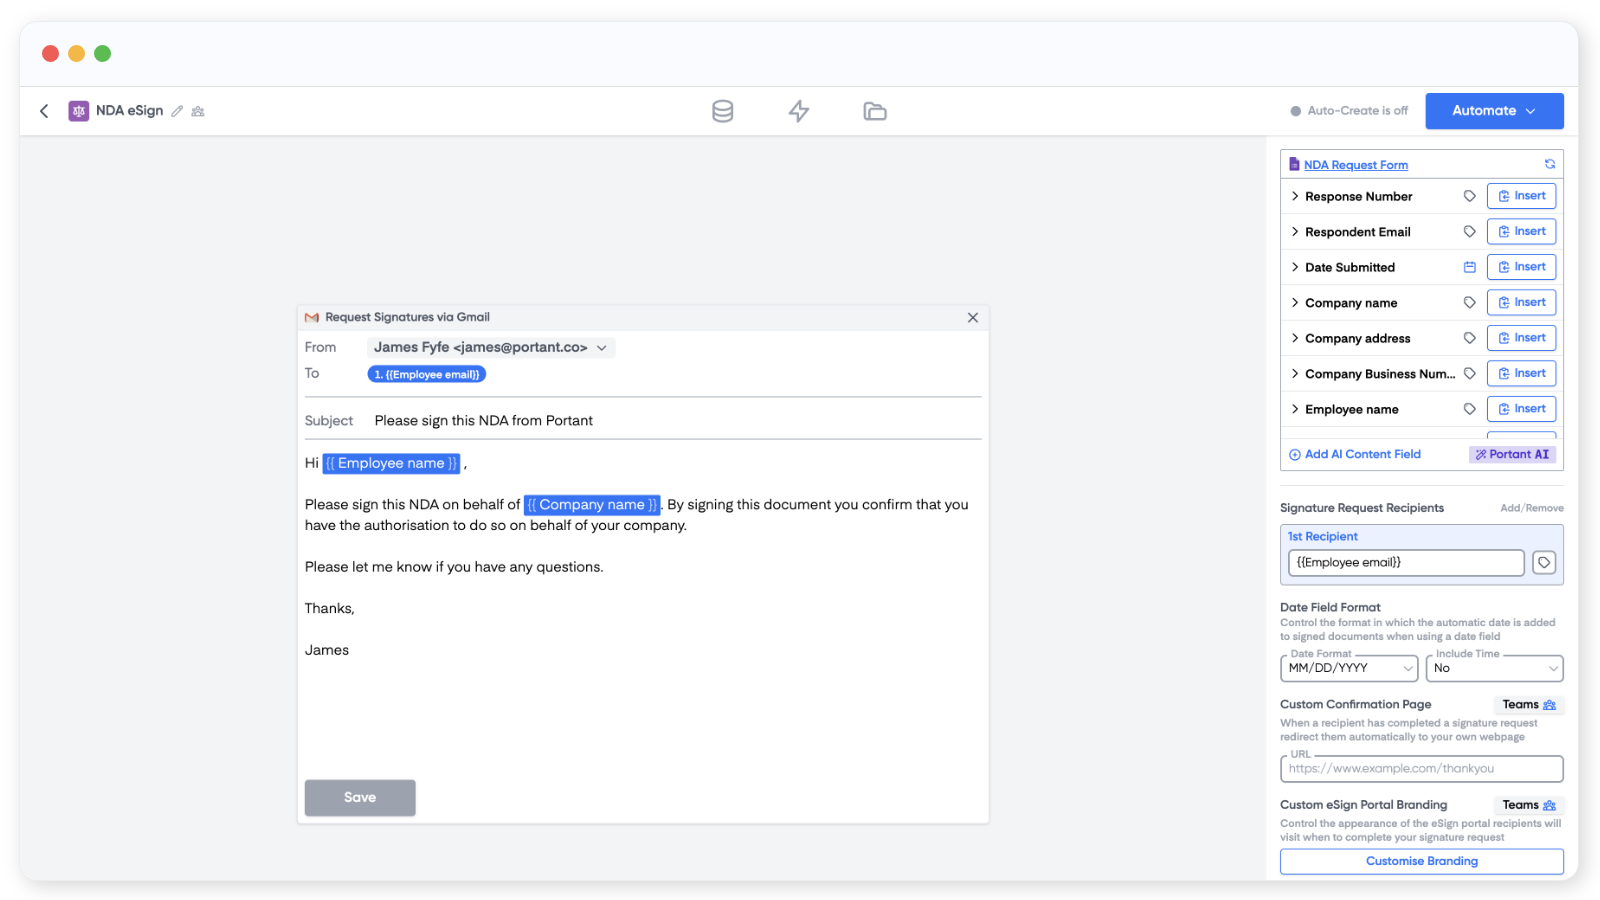
Click Save when you're done.
Note: On the right side, below the source table, you can edit the signed date format and customise the confirmation page URL and the eSign portal branding (colour and logo).
For HTML editing, attachments, and branding, see Customise the signature request email.
6. Edit the signature confirmation email (optional)
The confirmation email goes out once everyone has signed. Open the workflow overview and click the email block at the end of the workflow.
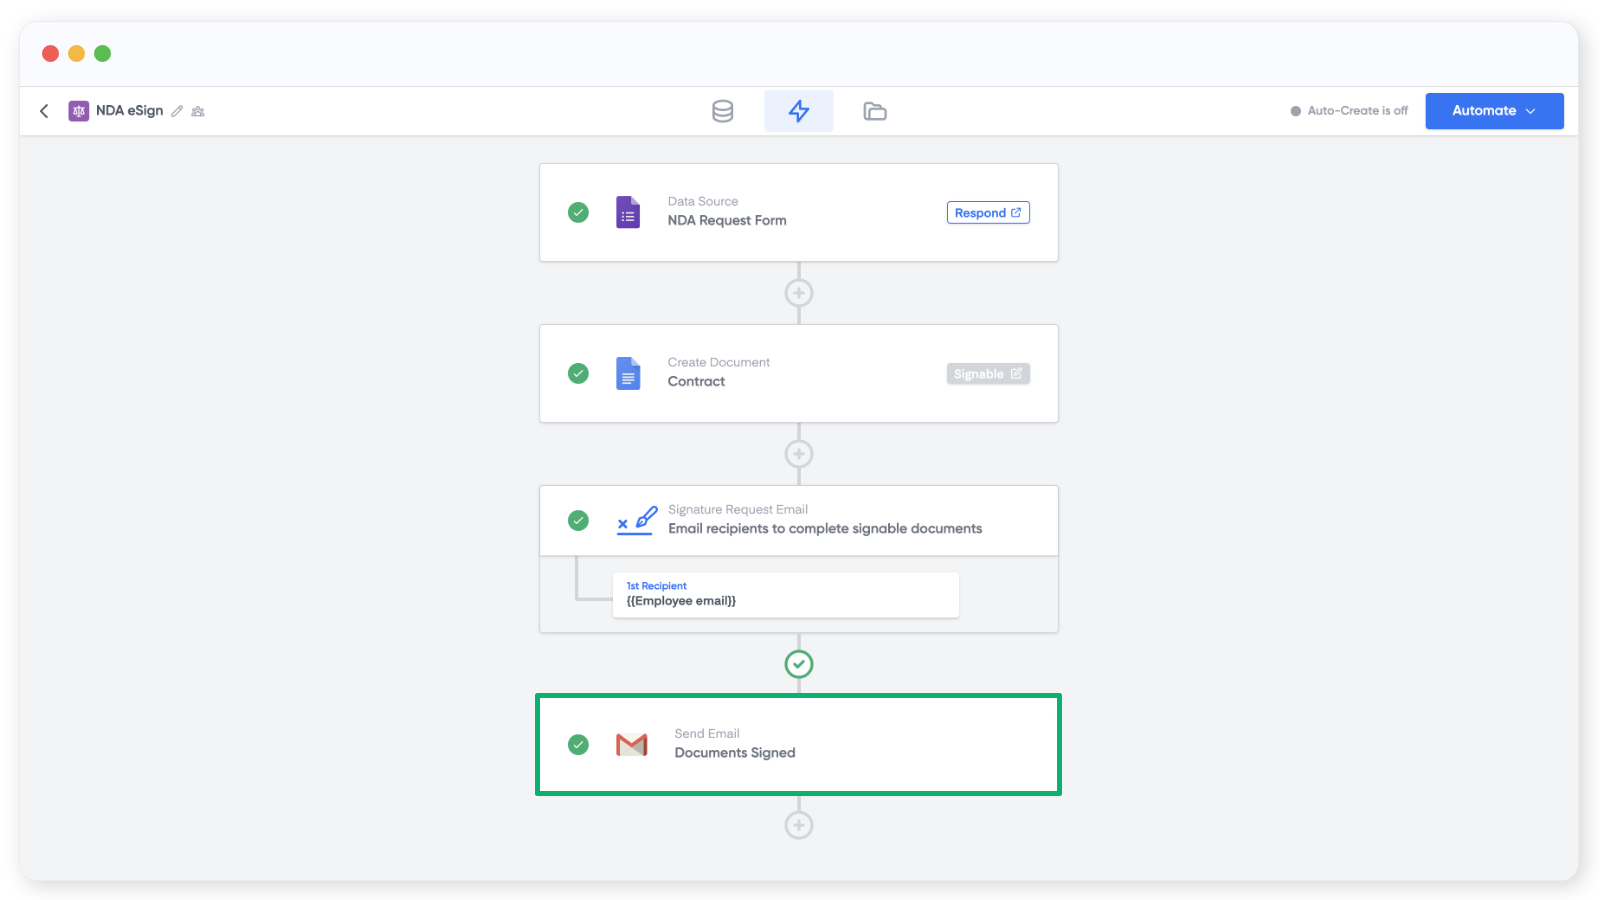
Set To, CC, BCC, Subject, and the Message body. Use tags from the source table to personalise.
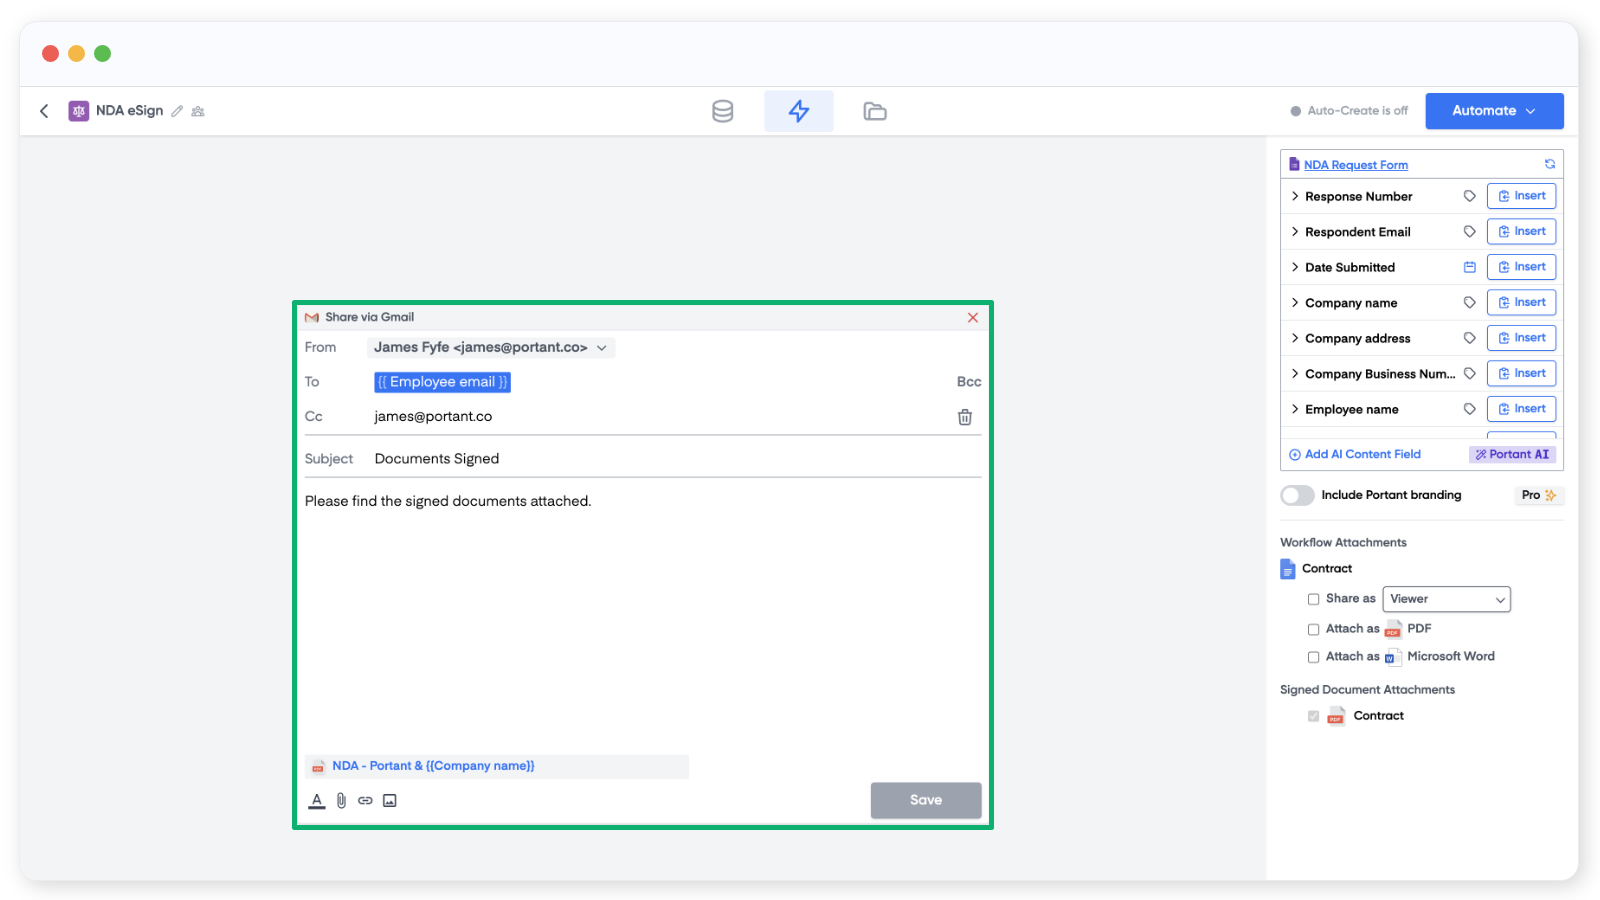
Save when done.
7. Turn on the workflow and test
Click Automate in the top right and toggle Auto-create on. Every new form response will now run the workflow and send a signature request.
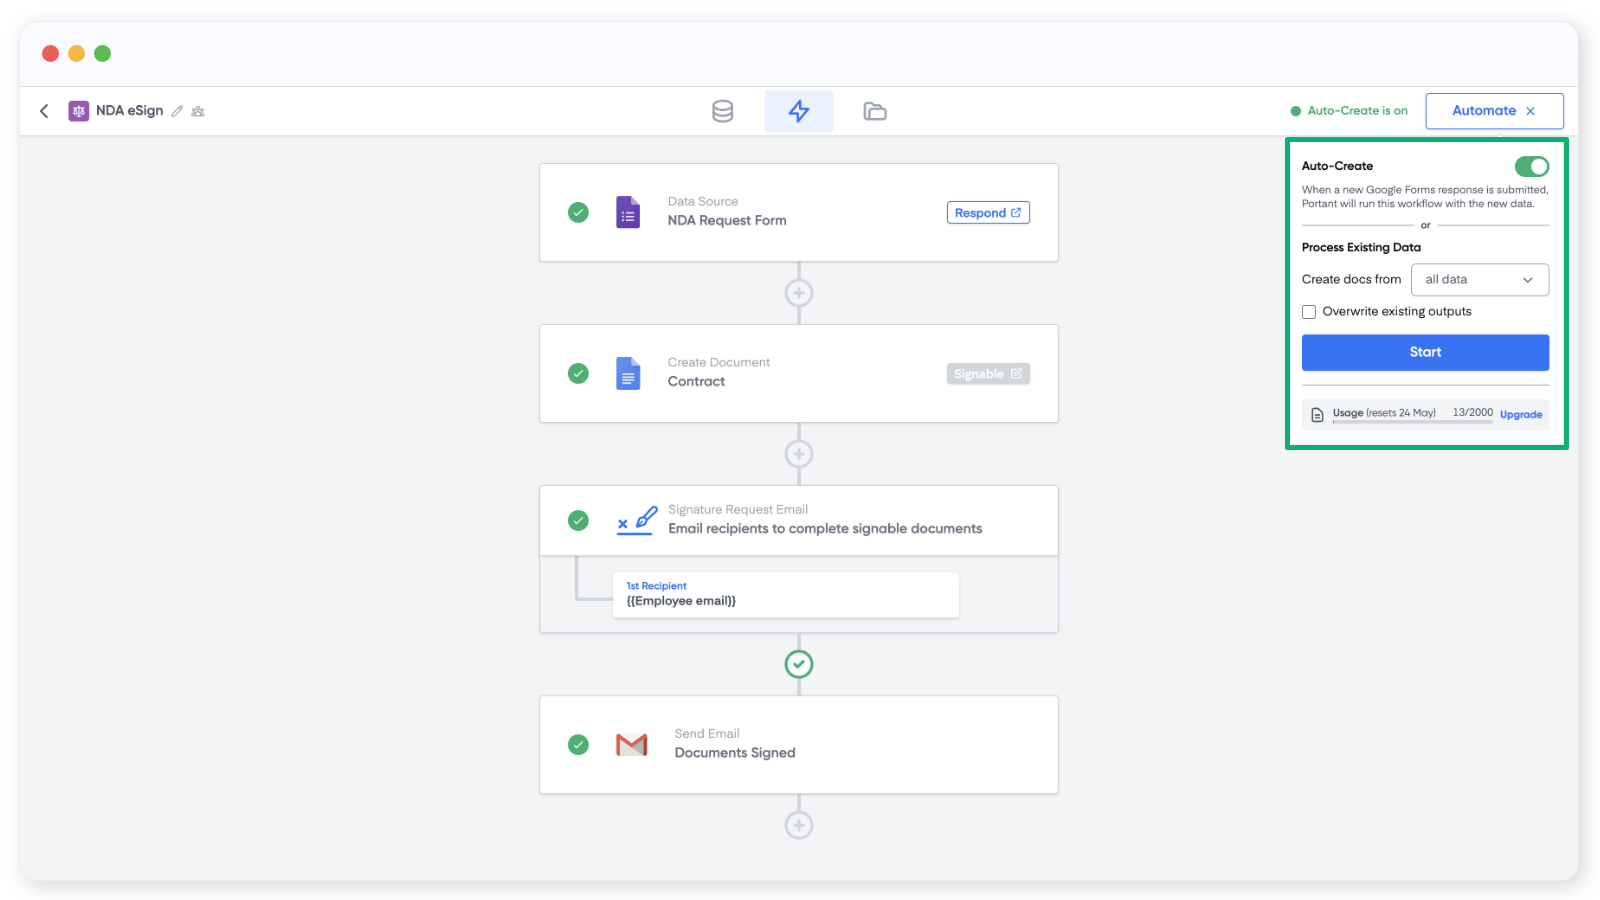
Note: Process Existing Data lets you re-run the workflow over old responses. Pick Custom range from the dropdown to process a slice instead of everything.
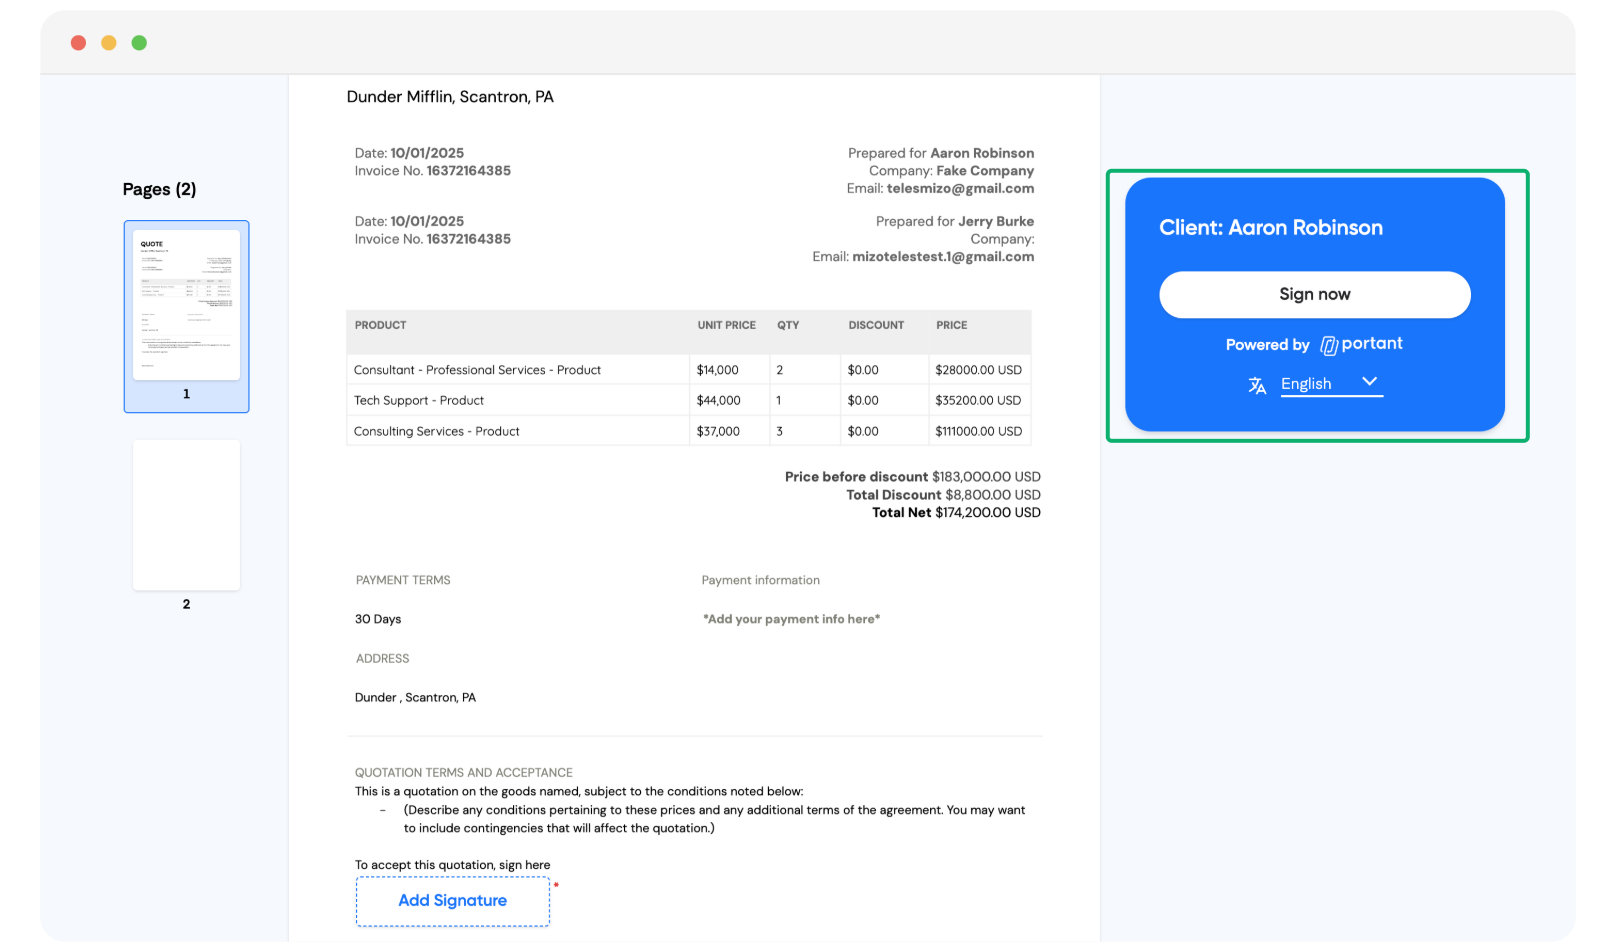
Submit a test response. The signer receives an email like this:
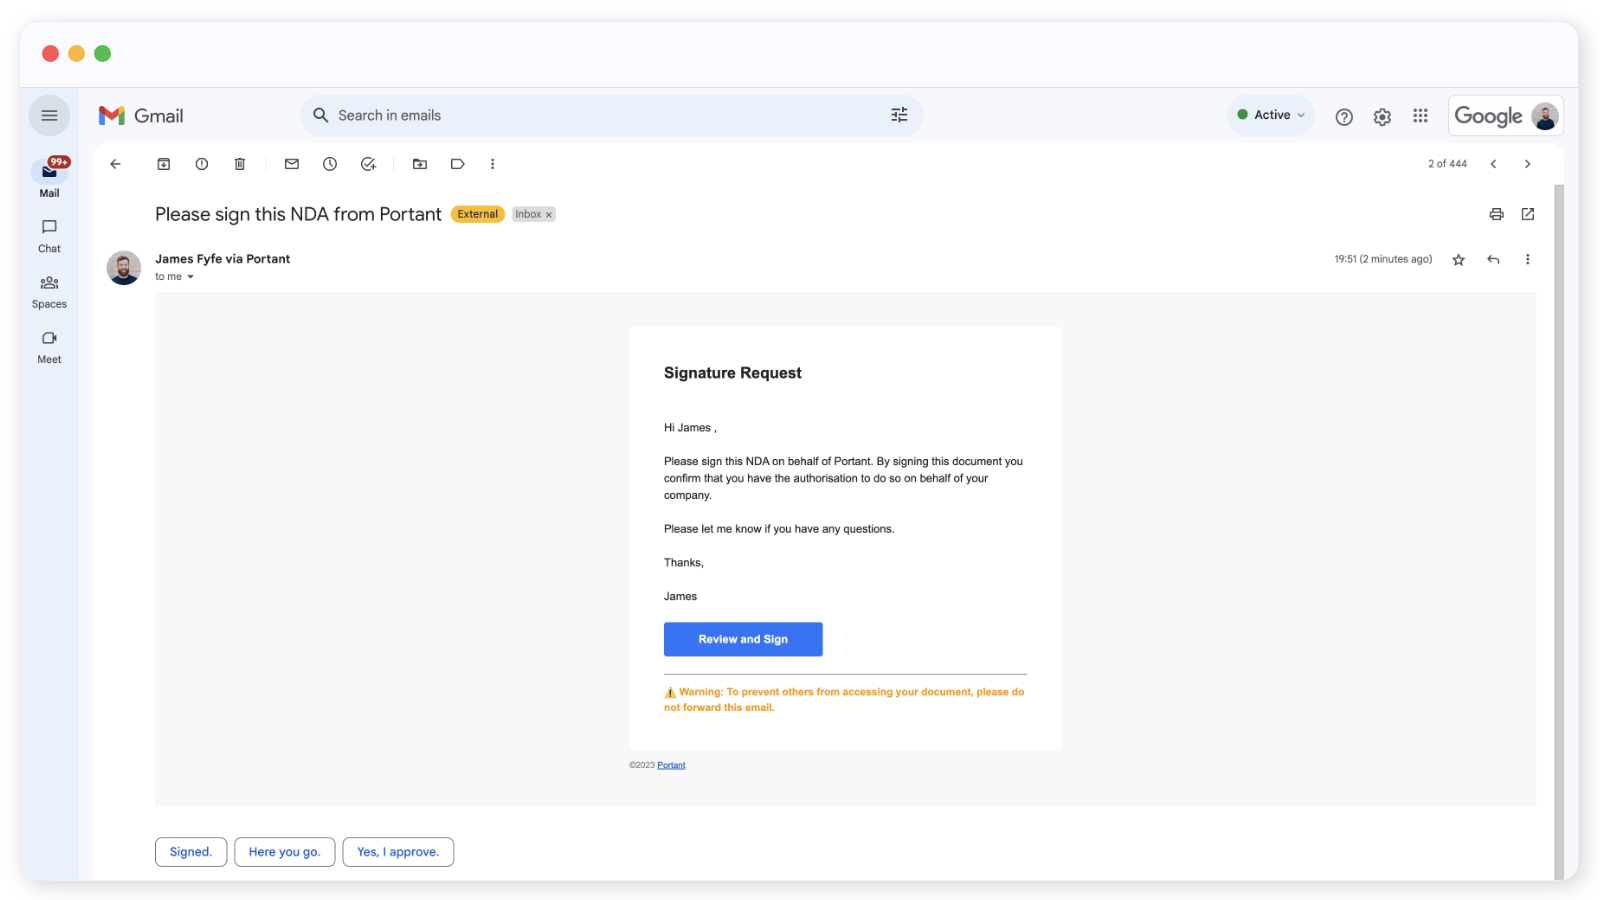
When they click Review and Sign, they land on the signing page.
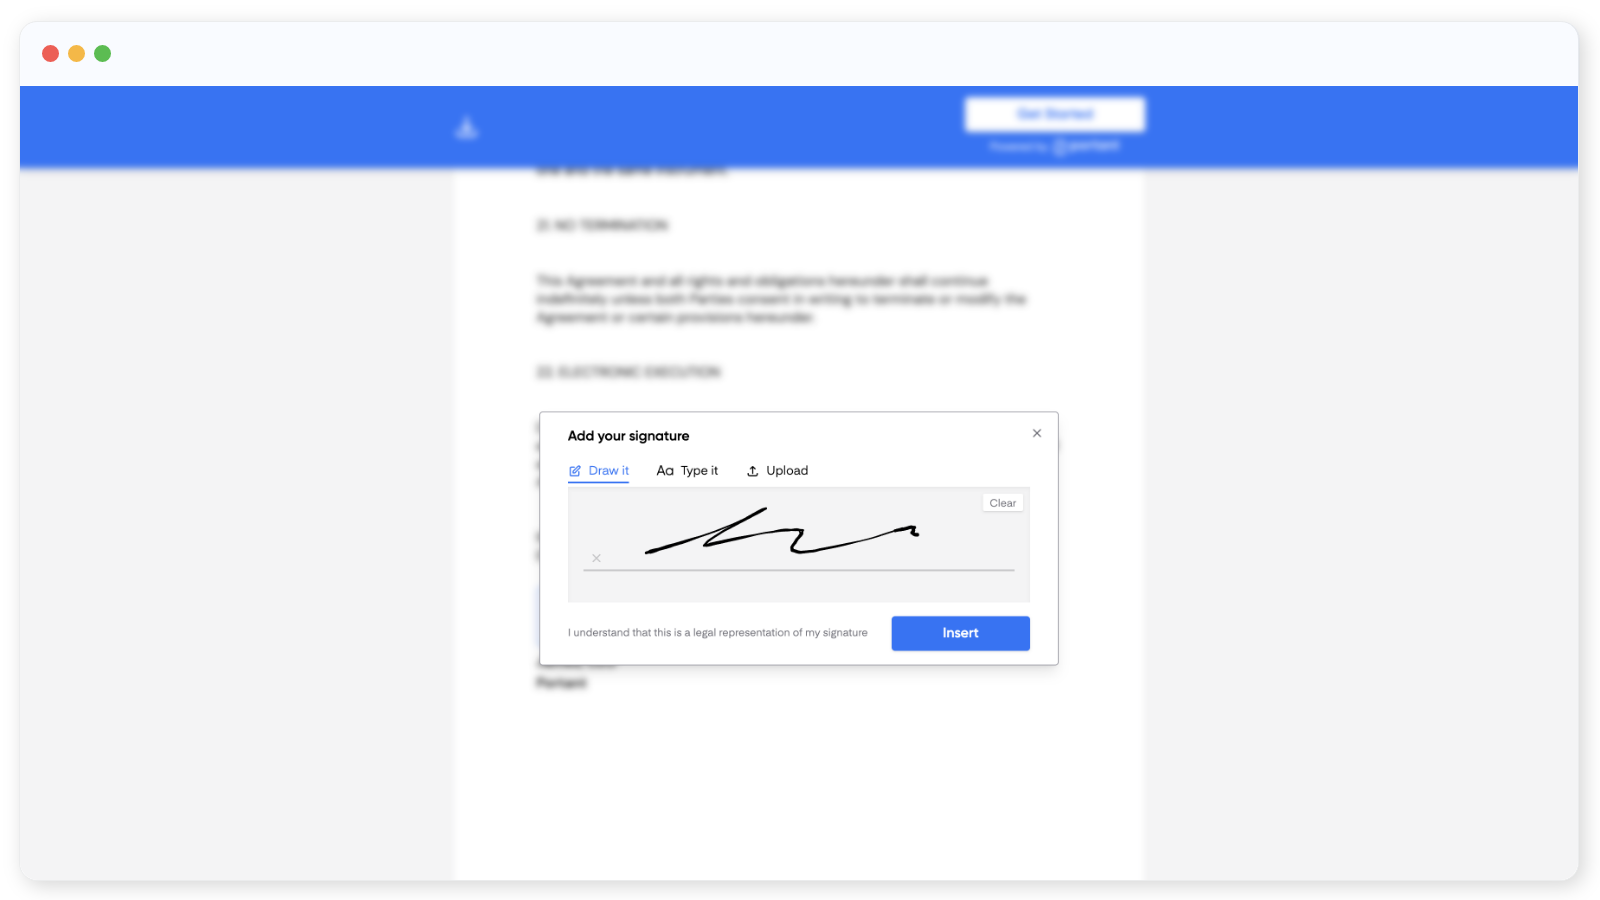
Note: Signers can pick their preferred language at this step.
After choosing a language, they sign the document.
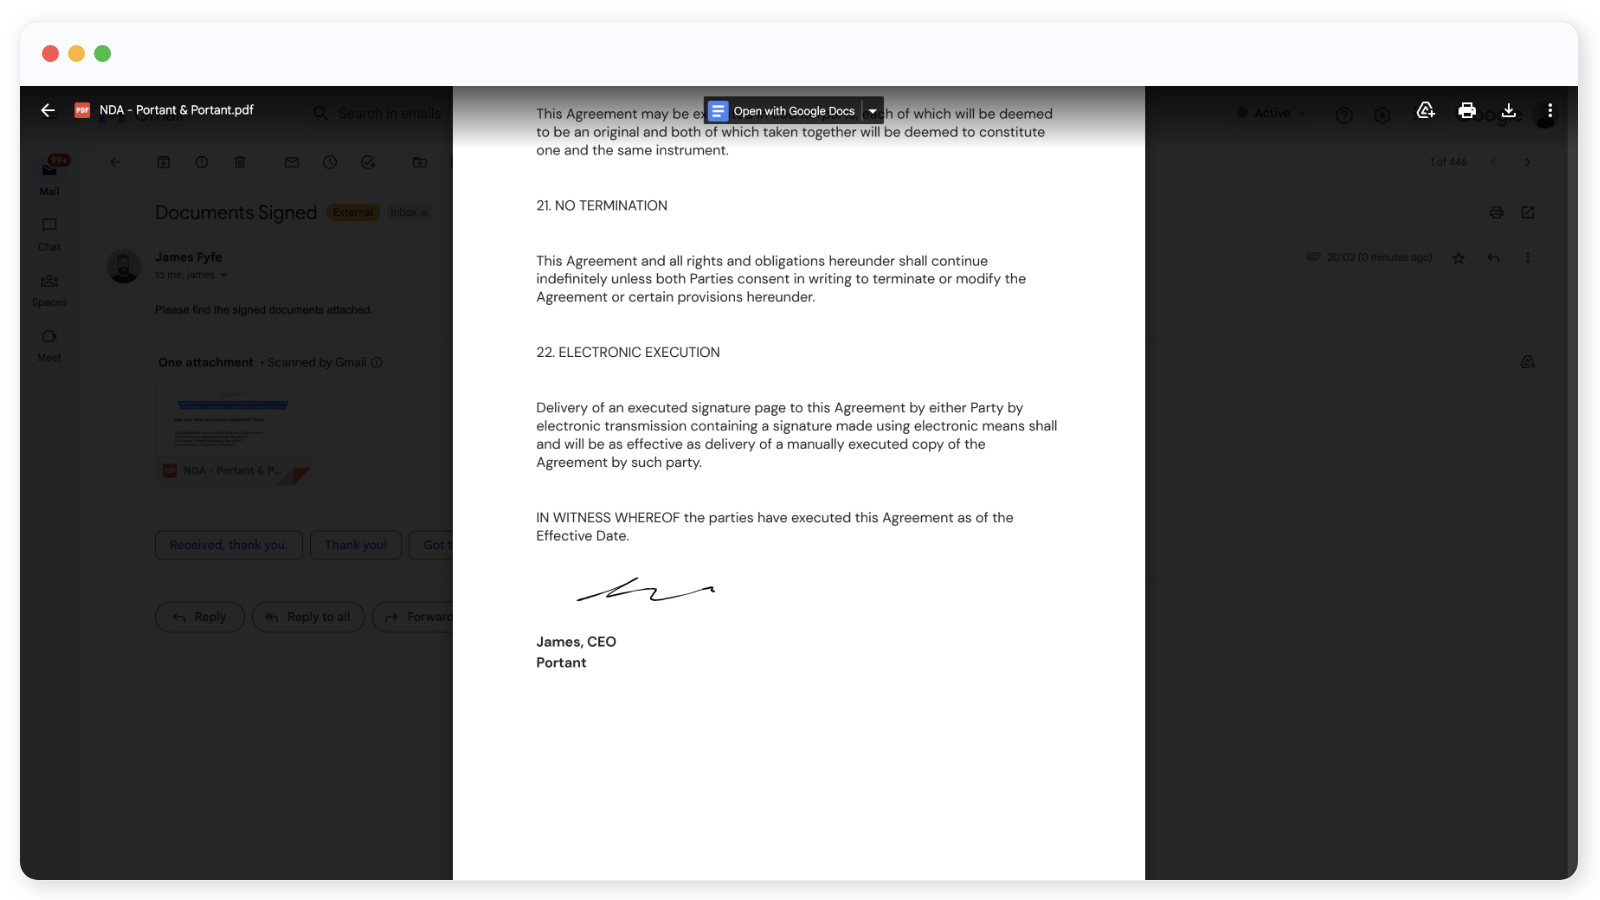
Once signed, a copy of the signed PDF is saved to your Google Drive folder, the confirmation email is sent, and a link to the signed document appears on the Outputs page in Portant.
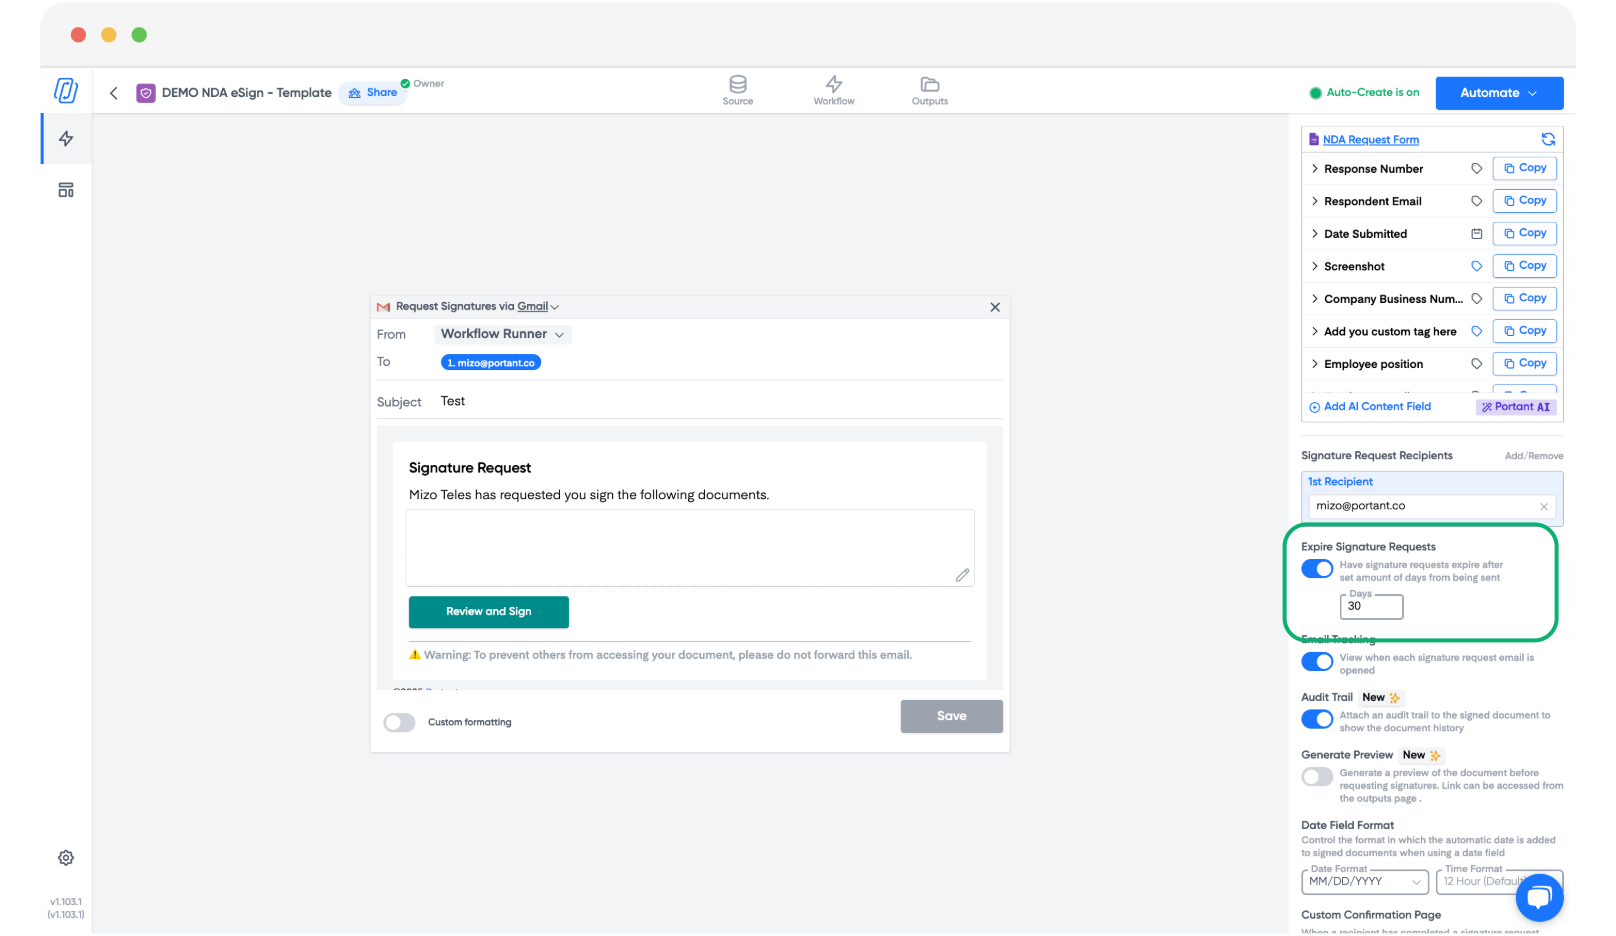
Note: Signature requests expire after 30 days by default. You can set a custom period (30, 60, 90 days) or disable expiry in the template block. See Signature link expiry.
That's your signature workflow live.
Related
- Multiple signers: request signatures from up to four people.
- Customise the signature request email: full HTML editing, attachments, and branding.
- Preview links: share a view-only link before sending for signature.
- Audit trail: append a signing audit to the signed PDF.
- Compliance: country-by-country legal positioning.