Workflow filters
Workflow filters let you run a workflow only when a row, response, or record matches the rules you set. Use them to skip data that isn't ready, or to route different cases to different workflows.
When to use a filter
A single filter is great when you only want one workflow to run on a subset of your data (for example, only deals where the stage is "Closed Won").
When you want different outputs for different cases, build a separate workflow for each case and add a filter to each one. For example, if you have one form for customer service and want to route enquiries to the right team:
- Add a question in the form that identifies the team (Shipping, Finance, Operations, Sales).
- Build one workflow per team and add a filter that targets the answer to that question.
- Each workflow runs only when its filter matches, so a single form can drive several different outcomes without making the form more complicated.
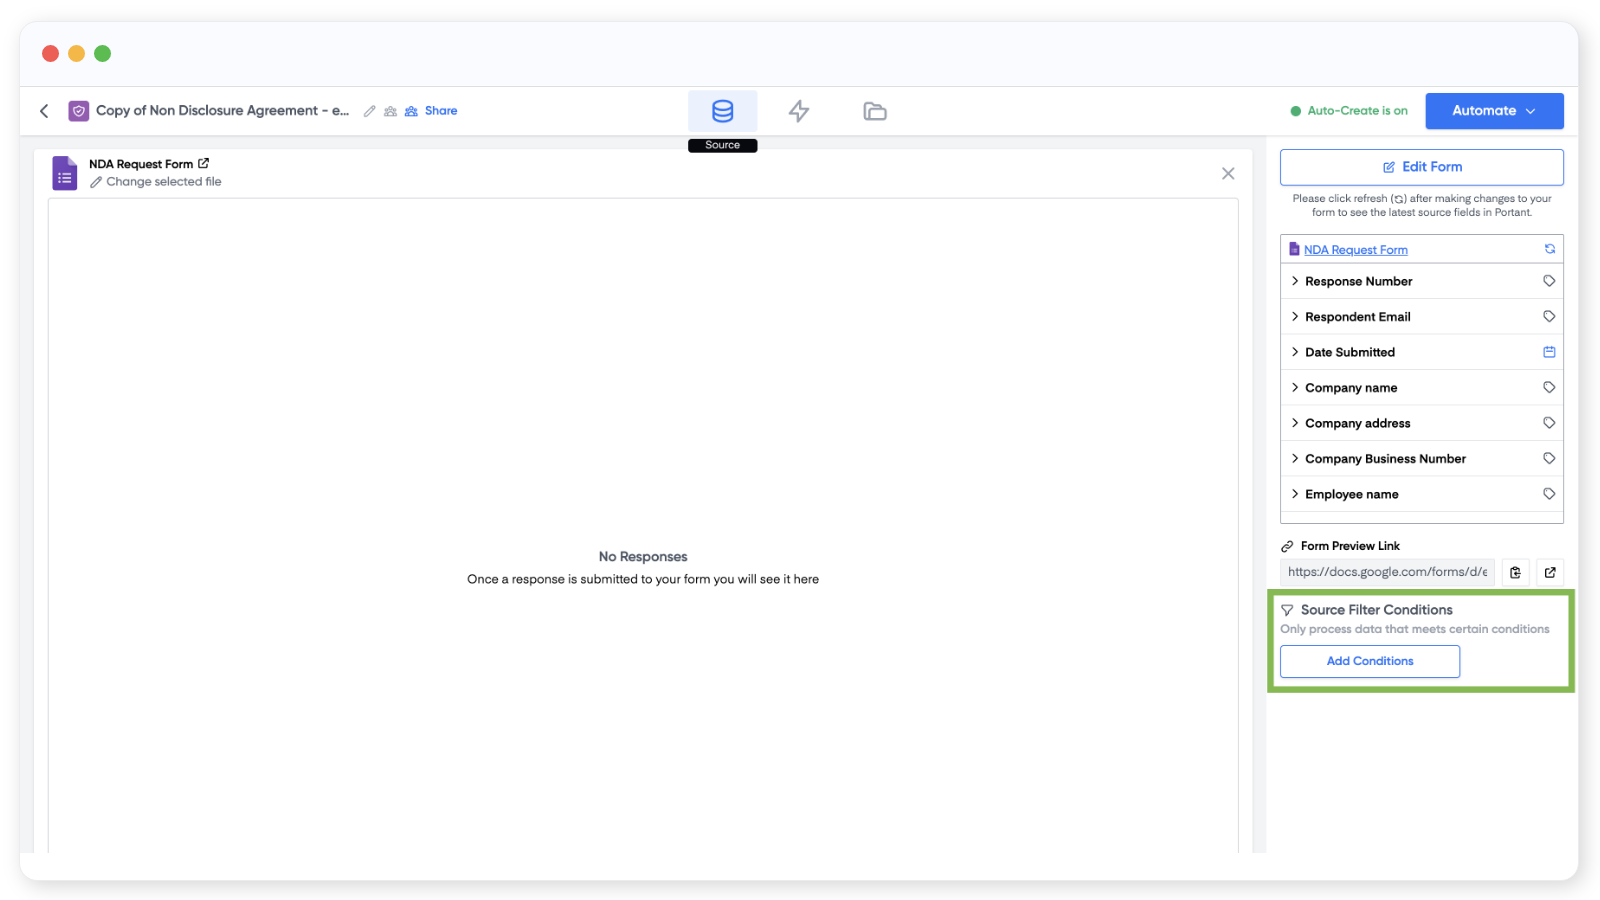
Add a condition
Open the workflow's source and click Add condition in the right-hand menu.
In the modal that opens, click Add condition again to choose the field you want to check and the operator to use.
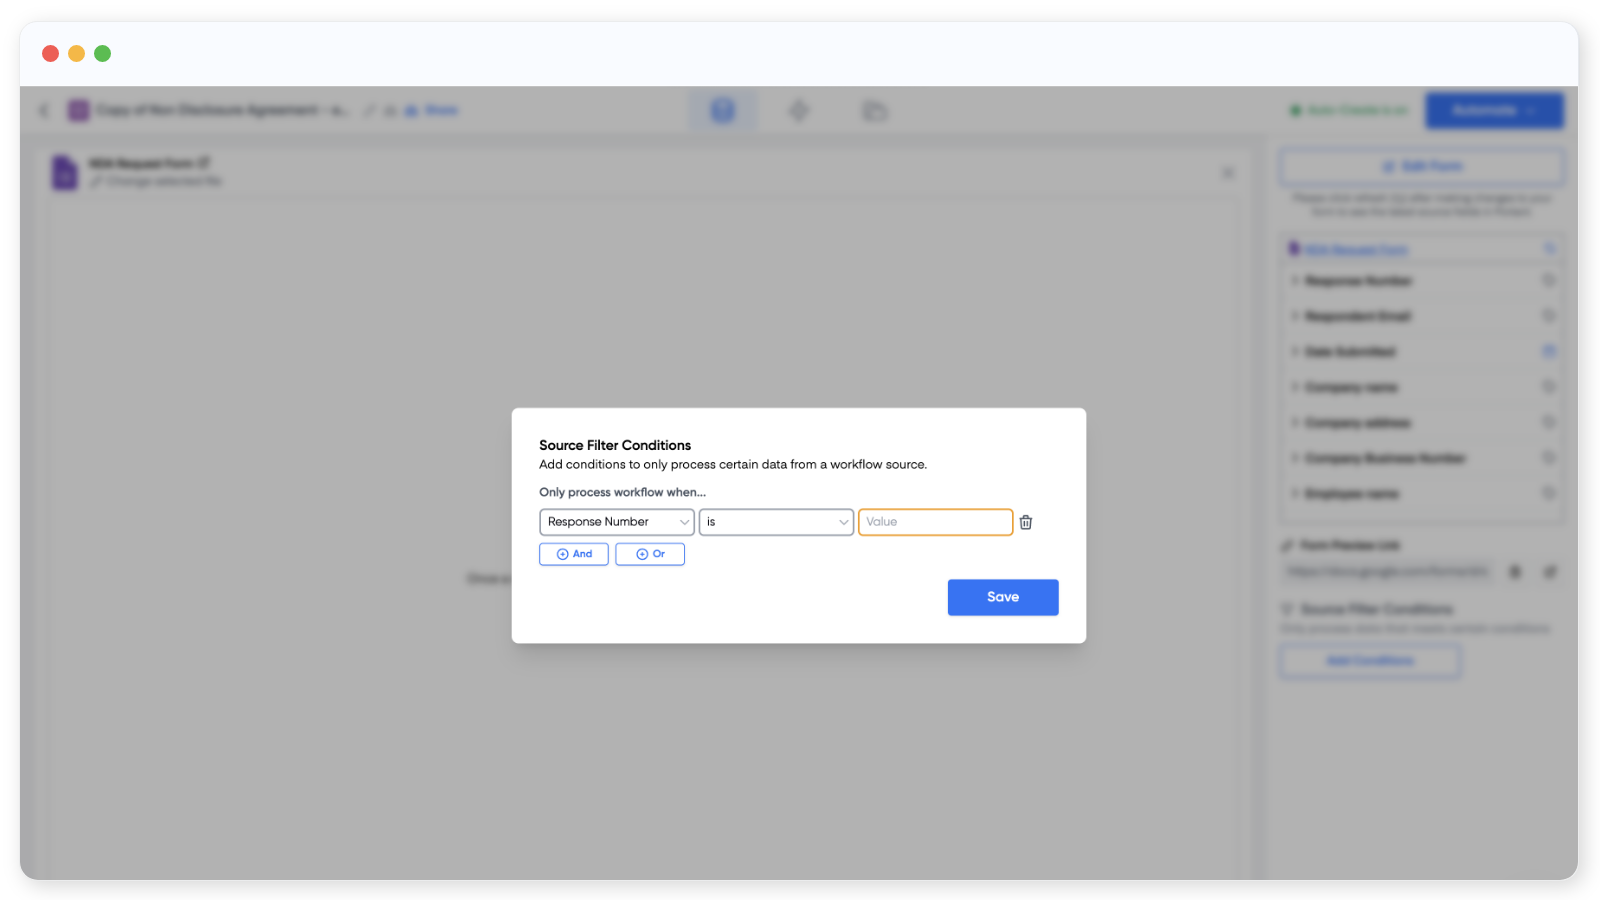
The operators available are:
- IS, the field equals a value you specify. Example: "Question X IS 5" is true when the answer to Question X is 5.
- IS NOT, the field does not equal the value. Example: "Column X IS NOT 6" is true when the value is anything other than 6.
- IS EMPTY, the field has no value. Use this to skip rows where someone hasn't filled in a key answer.
- IS NOT EMPTY, the field has any value at all.
Add multiple conditions
You can stack as many conditions as you need. After your first condition, click AND or OR to add another, and you can mix the two operators.
- AND requires every condition to be true for the workflow to run. "A AND B" only runs when both A and B match.
- OR requires at least one condition to be true. "A OR B" runs when either A or B matches.
That's it. Test your filter with a few sample rows or responses to make sure the right ones run through.